Agile Project Management Using JIRA and Greenhopper


Nov 09, 2011
If you have never heard of JIRA, JIRA is an issue and project-tracking tool for software development. GreenHopper is an Agile extension that you can add to JIRA.
At Oshyn, we see a lot of benefits in using GreenHopper, which is why it is our preferred Agile software development tool. While we also use it for non-Scrum projects, this post focuses on how we use this powerful and ever-evolving tool to manage our Scrum projects.
Project Setup
So how do you get started? Start by creating a new project: set project name, permissions, notifications, workflow, etc. Now set project components (e.g. Business Analysis, Information Architecture, Visual Design, Front-End Development, Back-End Development and Project Development). While on the same screen, set your project Versions as well. For example: Sprint 1 = Discovery, Sprint 2 = Design, Sprint 3 = Build and so on.
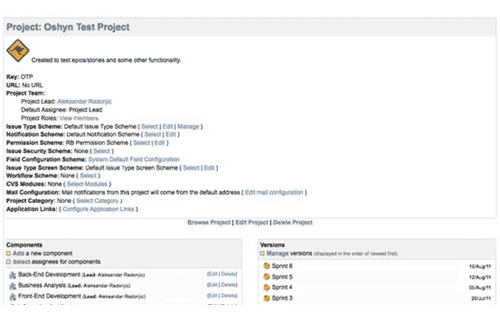
Project Setup Screen
Product Backlog
Now that your basic project settings are done you can start creating project backlog tasks, or alternatively import them to your Planning Board.
When creating project tasks try to use Epics, Stories and sub-tasks. NOTE: Epics are large user stories that can be dissected into several smaller user stories. Use them if your project has complex functionality that is yet to be defined in more detail.
Sprint Planning
Start you sprint planning by going to the Planning Board (unassigned tasks) and try to identify what can and can't be completed during your first Sprint. You can use drag and drop to assign your product backlog tasks to corresponding Sprints.
When planning your Sprints be realistic and try to think of best and worst case scenarios. Also, keep in mind that some requirements might not be fully documented, so Sprint 1 will probably have a lot of unknowns. There is also a good chance that some of your estimates will be wrong, but that’s ok, you will get better with subsequent Sprints.
The following examples show Sprint 3 (Build Phase):
Please note: if this was a real project you would obviously have more tasks, your task descriptions would be more informative and you would also have more than one assignee.
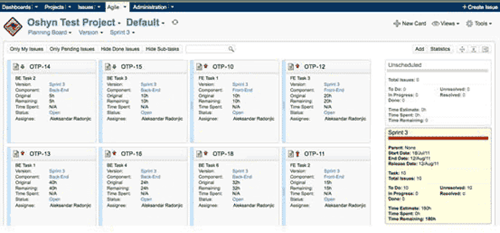
Planning board
Task Board
By this stage most of your initial setup should be done and you can shift your focus from setup to controlling and monitoring. This is where GreenHopper's Task and Chat Boards will come into play, allowing you to monitor individual tasks, dependencies and overall progress. Having this visibility will make your job a lot easier and it will also make your team more productive. If your team hates some of those annoying interruptions (e.g. “What are you working on”, how are you progressing”, or “what are you working on next”) you will love GreenHopper, because all that good information is available in JIRA. Task board clearly displays Sprint tasks, status, remaining hours, team members/resource and next to-dos.
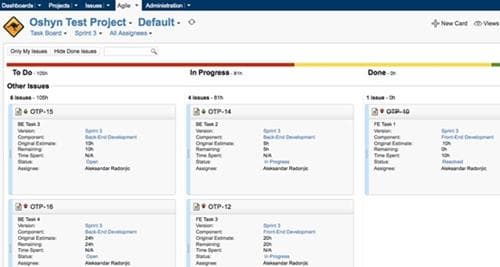
Task Board
Chart Board
Chart Board provides a graphical representation of the progress of your current Sprint. Being able to see: team effort, guideline, trends and required daily burndown rate helps us monitor our Sprint more effectively.
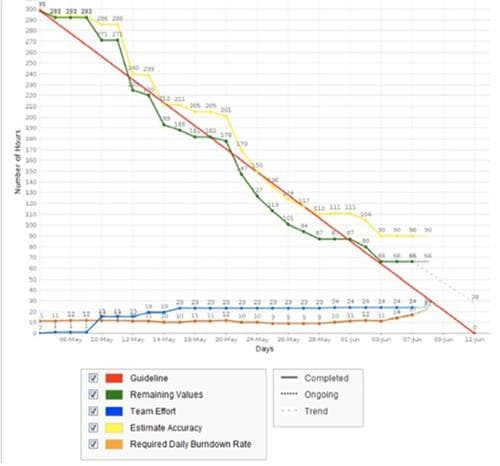
Chart Board
Release Board
The Released Board is another useful feature, giving you a high level view of previous/released Sprints, so if you need a quick overview of what you’ve completed so far (e.g. Sprint 1, 2 and 3) and what is still outstanding (e.g. Spring 4,5 and 6) this is good place to start.
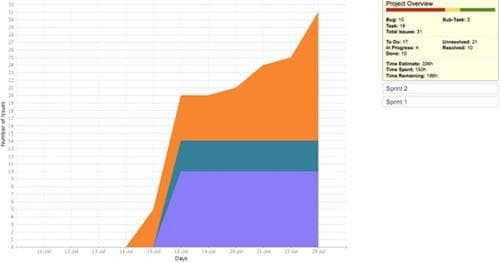
Release Board
Setting up Search Queries
Issue Navigator allows you to see all issues/tasks in the system. Start by creating custom search filters (using simple or advance view) which allow you to display search results by component/version, issue type, status, priorities etc… For example, you might only want to see high priority tasks in Sprint 3 that are still outstanding. Creating and saving multiple filters will allow you to quickly find issues or tasks, and they will also make your project dashboard a lot more useful and informative. NOTE: A lot of Project Dashboard Gadgets are powered by your saved search queries.
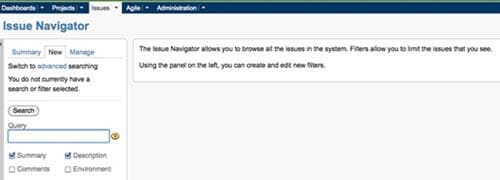
Issue Navigator
Project Dashboard
My next step is usually to set up a Project Dashboard. You can go crazy and create as many gadgets as you'd like, but I usually try to keep my dashboard relatively clean with 4-6 gadgets; I usually use the following gadgets:
- Agile – basic Sprint information and Burndown chart
- Days remaining – countdown of days remaining
- Project progress – progress bar (to-do, in progress and done)
- Issues/tasks statistics - grouped by resource
- Group time sheet – hours logged (per team member)
NOTE: When deciding on gadgets think about your Audience (Business Team, Developers, Stakeholders etc…).
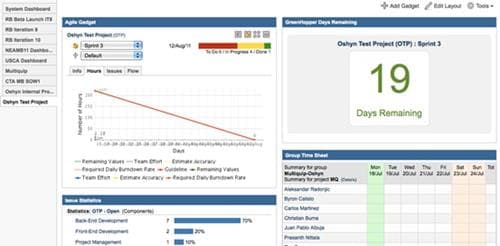
Project Dashboard
JIRA also has a number of useful reports that you can use to stay on top of your project. For example, you can use Project Pivot and Timesheet reports to extract data on actual hours.
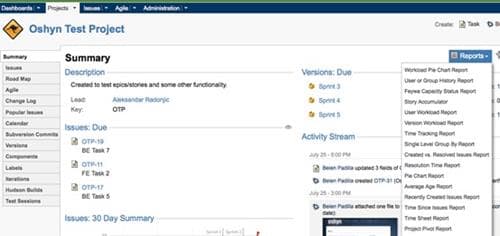
Project Reports
I should also point out that JIRA has some nice alerts, instantly notifying you of any updates (e.g. new comment or status update). This is especially useful when dealing with risks, critical path items and dependencies.
To sum it all up, JIRA Greenhopper is a great tool for managing scrum projects, but like any other tool you will need to be diligent in keeping it up to date.
Recent Insights
-
BLOG

 Leonardo Bravo
5 DevOps Metrics That Actually Matter for Enterprise Cloud Infrastructure
-
BLOG

 Patrick Wirz
Celebrating Oshyn’s 2026 Sitecore MVPs
Excellence in Tech and Strategy
-
BLOG

 Esteban Bustamante
Mastering Adobe Composable
Part 3/3: AEM Hybrid Options
-
BLOG

 Esteban Bustamante
Mastering Adobe Composable
Part 2/3: AEM Headless Tools


