Apr 15, 2024
Setting up a local AEM instance can sometimes leave you scratching your head. However, this blog article will help you perform some troubleshooting and address the issues you might encounter.
Starting From the Beginning - CHECK
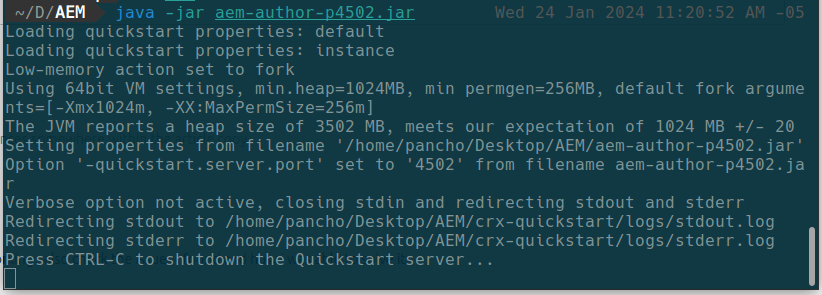
One of the initial issues often encountered occurs when everything seems to be set up and working fine. You might attempt to run java -jar aem-author-p4502.jar in the terminal, and expect everything to start running correctly. However, what happens when the browser never displays the http://localhost:4502/ screen?

In our situation the JAVA version was v17, whereas the AEM docs specified a requirement for Java versions ranging from 8 to 11. Even after switching to Java version 11, the issue persisted. In this instance the JAVA_HOME variable needed to be updated after installing Java 11.
Setting Environment Variables Correctly
Using Ubuntu (Linux),navigate to the .bashrc file located at /home/{user}/.bashrc and make the necessary edits to set the JAVA_HOME variable correctly.
JAVA_HOME=/usr/lib/jvm/java-11-openjdk-amd64
PATH=$PATH:$HOME/bin:$JAVA_HOME/bin
export JAVA_HOME
export JRE_HOME
export PATH
Before: JAVA_HOME=/usr/lib/jvm/java-17-openjdk-amd64
After: JAVA_HOME=/usr/lib/jvm/java-11-openjdk-amd64
After making these changes, close all terminals and check the variable using echo $JAVA_HOME. It should print something like:
JAVA_HOME=/usr/lib/jvm/java-11-openjdk-amd64.
With this correction, the AEM instance should start working and the browser displays the AEM login screen.
Service Pack
After cloning the project and following the instructions to start it, an error might occur.
Unlike other CMS experiences where the project starts working with a single command, in AEM it’s necessary to first start the Quickstart Jar file (responsible for initializing the AEM instance). Then, it is possible to add the cloned project to that instance using the command mvn clean install -PautoInstallPackage.
To clarify further:
-
Navigate to the folder containing your AEM Quickstart.jar.
Rename the
quickstart.jartoaem-author-p4502.jarand runjava -jar aem-author-p4502.jar.Keep this terminal window open.
-
Navigate to the cloned project and run
mvn clean install-PautoInstallPackage.You only need to do this once. After installation, simply run
java -jar aem-author-p4502.jarin the AEM folder, and the project should appear.
Despite thinking that everything was resolved, the Live Editor stopped working after installing the new project. After checking the URL http://localhost:4502/system/console/bundles, you might notice packages not installed. Some projects require a Service Pack to be installed.

If you encounter this issue, you'll need to obtain the Service Pack from the project owner and install it from http://localhost:4502/crx/packmgr/index.jsp.
Installation and Activation
-
Click the upload package button.
-
In the dialog that appears, select the Service Pack file and click the install or update button.
-
Wait for the process to finish. Check the packages that are not running at
http://localhost:4502/system/console/bundlesand click the play button.
Wrapping Up
Hopefully this blog helped you to troubleshoot your local AEM installation. However, if it didn’t, reach out to Oshyn for our Adobe expertise.
This site is protected by reCAPTCHA and the Google Privacy Policy and Terms of Service apply.


