


Aug 10, 2020


Episerver offers a powerful set of RESTful-based services for their B2B Commerce solution. These services are made up of two REST API’s:
- Storefront API
- Administrative API
The Storefront API is used to interact with the objects that make up an online shopping cart, such as retrieving a list of products, adding a product to a user’s cart, updating the order details and complete the checkout process.
The Administrative API, on the other hand, provides data access to ALL objects in the B2B Commerce platform, including not just those under the shopping cart experience but things such as categories, promotions, payment methods, customers, tax exemptions, etc. It allows us to read and write administration data without the use of the admin console, however since its data centric, it misses out on following the required workflow needed to place and submit an order.
Note: Use Swagger to view and test endpoints by using “<your website URL>/swagger“.
In this post I will show you how to use the Storefront API methods so that you can build a single page application using the framework you are most familiar with. In particular, I will show you how to accomplish the following tasks:
- Sign in to be able to use the API.
- Retrieve a list of Products.
- Add a product to the cart.
- Display the cart information.
- Submit the order.
Sign in to be able to use the API
First, to be able to call the API methods you need to create a user session within the B2B Commerce site. You can use any of the following to sign in and create the user session.
- A session will be created automatically for you once you log in the B2B Commerce admin site using the URL you use for the SDK installation. This session will let you use any API methods as long as you are in the same website content.
- You can use the GetInsiteUserSession() method provided in the
InsitePlusSitecore.Core.RestClientlibrary that is part of the B2B Commerce SDK installation - You can sign in and create a user session by using just the API services. To do this you need to make two requests:
- one to authenticate with Identity server and obtain an access token
- a second one to create the user session within the B2B application.
I will be going into more details on how to do #3 in a following post.
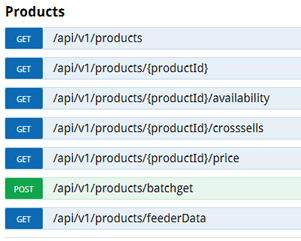
Retrieve a list of Products
The Storefront API provides the following methods to work with Products.
Every API method, including the ones above, has a set of parameters you can add to modify/filter the results.
Some examples on how you use parameters are:
/api/v1/products?page=1&pagesize=10 |
Retrieves the first 10 products |
/api/v1/products?model.erpNumbers=A0001&model.erpNumbers=B0001 |
Retrieves products with ERP Numbers A0001 and B0001 |
/api/v1/products/dda7a306-5127-4b4a-b989-ac0900002572 |
Retrieves product with Id {dda7a306-5127-4b4a-b989-ac0900002572} |
/api/v1/products?model.query=nvidia |
Retrieves all product that contain the word “nvidia” |
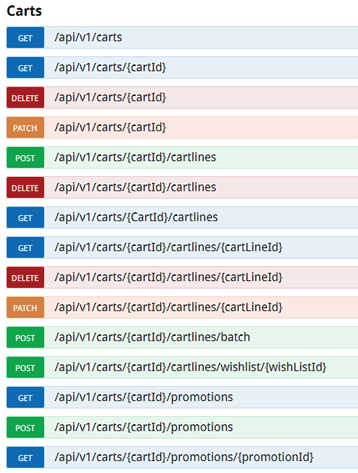
Add a product to the cart
These are some methods that can be used to interact with the shopping cart.
Once you have selected a product you can use the following POST call to add it to the cart:
/api/v1/carts/{cartId}/cartlines
Note: You need to replace the {cartId} parameter with the id for the cart that was created when the first product was added. You can use the GET method /api/v1/carts and filter the result by the current user session, however the API keeps track of the cart created for each session and allows us to replace the {cartId} parameter with the “current” keyword given us the following API call:
/api/v1/carts/current/cartlines
Since this is a POST method you need to pass data as JSON.
Data
{
   "productId": "dda7a306-5127-4b4a-b989-ac0900002572",
   "qtyOrdered": 1
}
Display the cart information
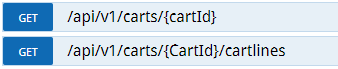
You can use the following API methods to get the shopping cart details:
Remember to replace the {cartId} with the keyword “current”.
The first method call will get you general information for the created order, like order date, order number, promotion code and the Shipping Details like Bill To and Ship To addresses.
The second one will show all the information for all the products that have been added to the cart, including ID, name, description, quantity ordered, price, product images, product availability, etc.
Submit the order
Finally, you can complete your order using the following request.

The data in the request will need to include the current cart updated with the Shipping Details and Payment Information. This data corresponds to the JSON model returned by the API call we just used to display the cart information and it looks like this:
{
  "id": "current",
  “status": "Submitted",
  “billTo": <Updated with Customers information>,
  “shipTo": <Updated with Customers information>,
  “paymentMethod": <Updated with selected payment method>,
}
Once a cart is submitted an Order will be created inside the B2B Commerce application and ready to be processed further by any Jobs you might have defined inside the B2B Commerce Application.


This site is protected by reCAPTCHA, and our Privacy Policy applies.