


Oct 17, 2019


Sitecore PowerShell Extensions (SPE) scripts are usually employed by technical users of Sitecore (e.g. developers and administrators). For those users it’s not difficult to open a PowerShell ISE session to create, run, save, and load their scripts. But PSE scripts are highly customizable and powerful, and they can provide useful functionality for non-technical users of Sitecore (e.g. editors and marketers). These users just want to run the script much like any other functionality in Sitecore, without the need to open the PowerShell ISE and manually load the scripts. (And the ISE might be even restricted from them by administrators.) So this post shows script developers how to make scripts available to non-technical users in Sitecore’s desktop interface through the Reporting Tools menu in Sitecore’s Desktop Start menu.
Pre-requisites
Sitecore 8 or later (examples in this guide use Sitecore 9.0 Update-2)
Sitecore PowerShell Extensions, full package, version 5.0 (it should work with Sitecore 8+)
Steps
Login to Sitecore with a user that has administrative privileges.
Open the Desktop interface
Open the Content Editor
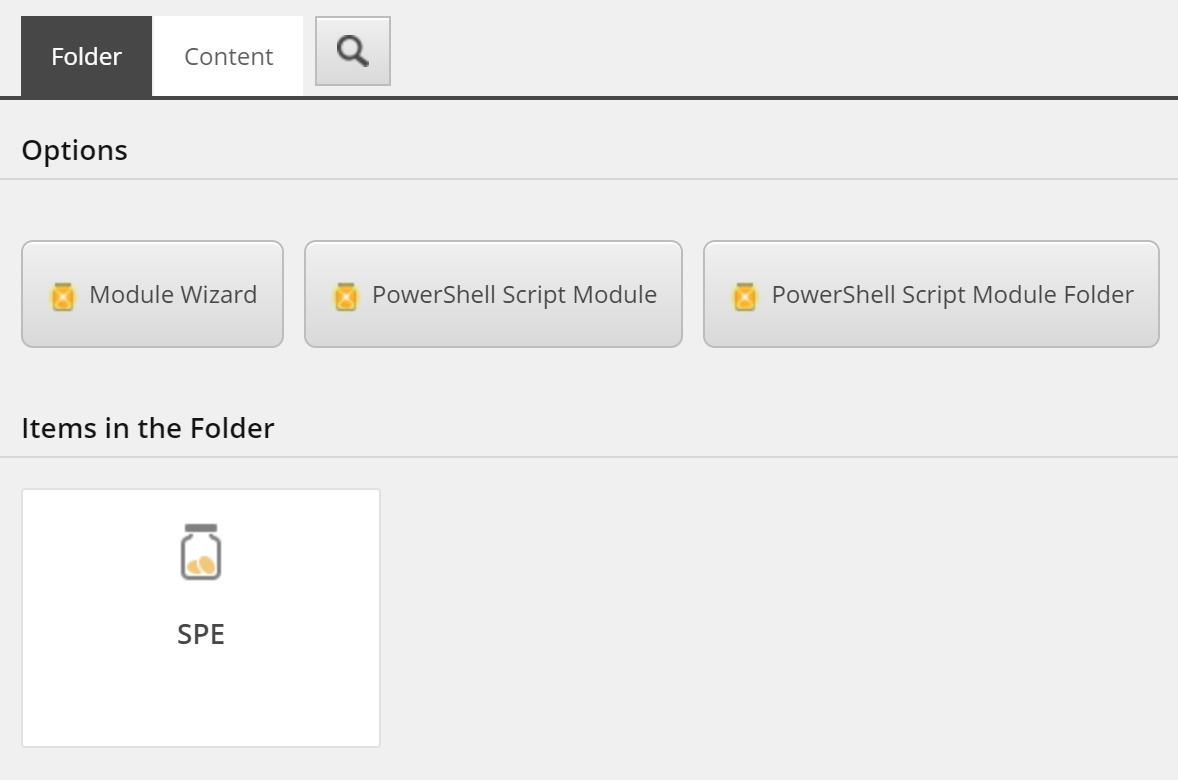
On the tree, navigate to
sitecoresystemModulesPowerShell/Script LibraryOn the right panel, make sure the “Folder” tab is selected
Click on the “Module Wizard” button
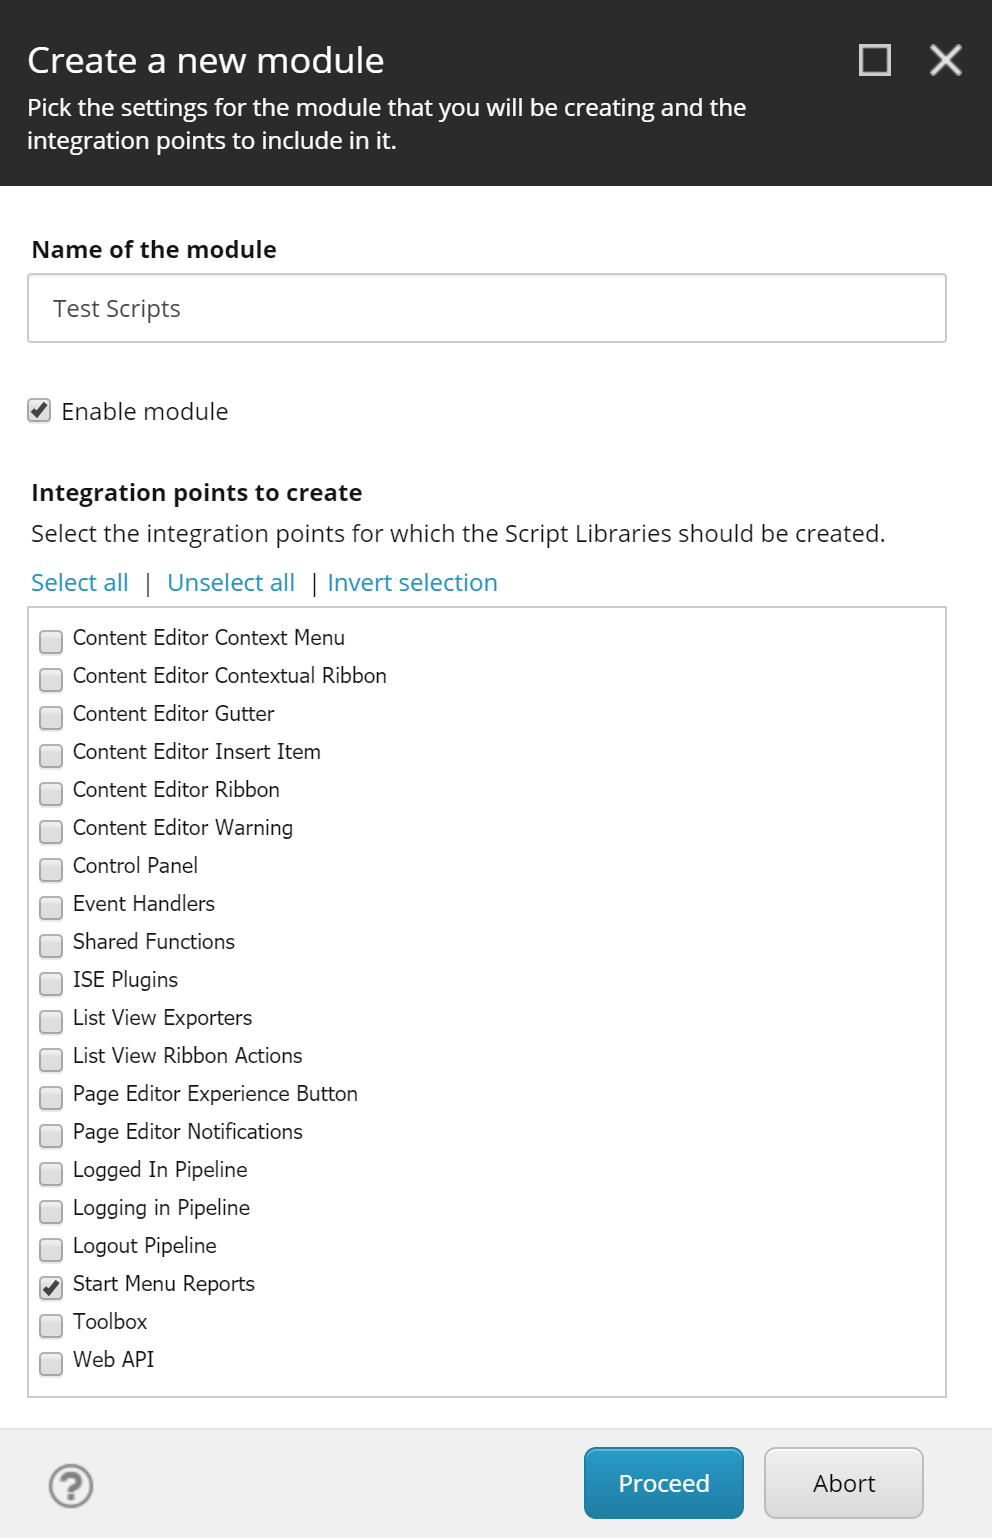
Enter a name for your module, and in the list of “Integration points to create”, select “Start Menu Reports”. Make sure the “Enable module” checkbox is selected. As you can see here, you have many places where you can integrate your scripts in the Sitecore interface, such as the Content Editor ribbon, the Control Panel, and even the Web API. Here I’ll only discuss the Start Menu Reports integration.
Click on the Proceed button. After the Wizard finishes processing, close the window and open the
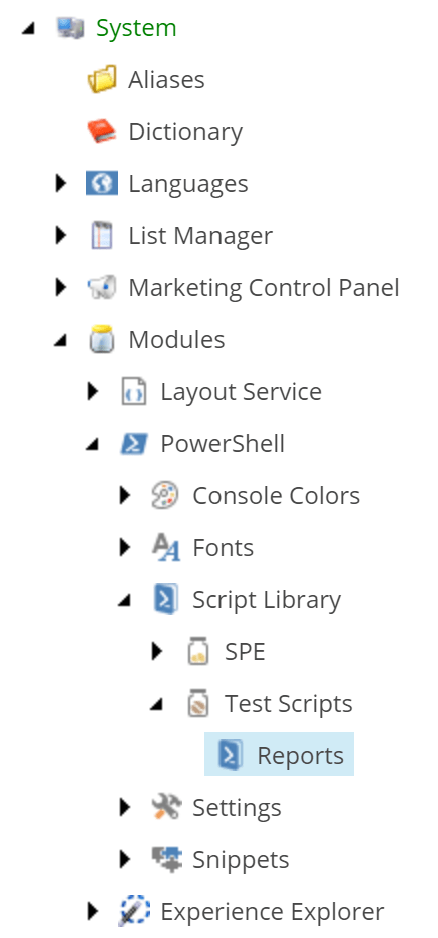
sitecoresystemModulesPowerShell/Script Librarynode in the tree. You should now see your new script module with the name you entered in the previous step. Open that node too, and you should see a Reports node, click on it:
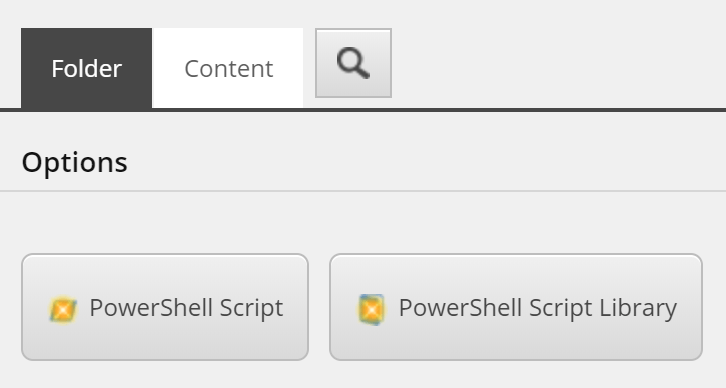
On the right panel, you will see 2 buttons (make sure you are in the “Folder” tab). Click on the “PowerShell Script Library” button:
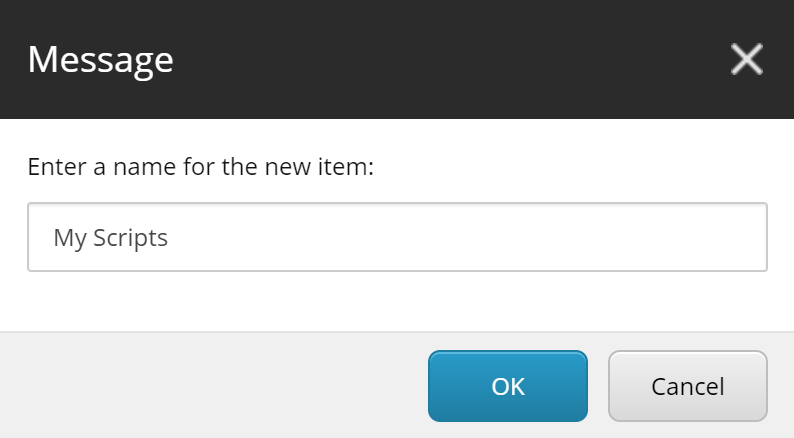
In the popup dialog, enter a name for your library and click OK. This will be the name displayed to the user in the Reporting Tools menu.
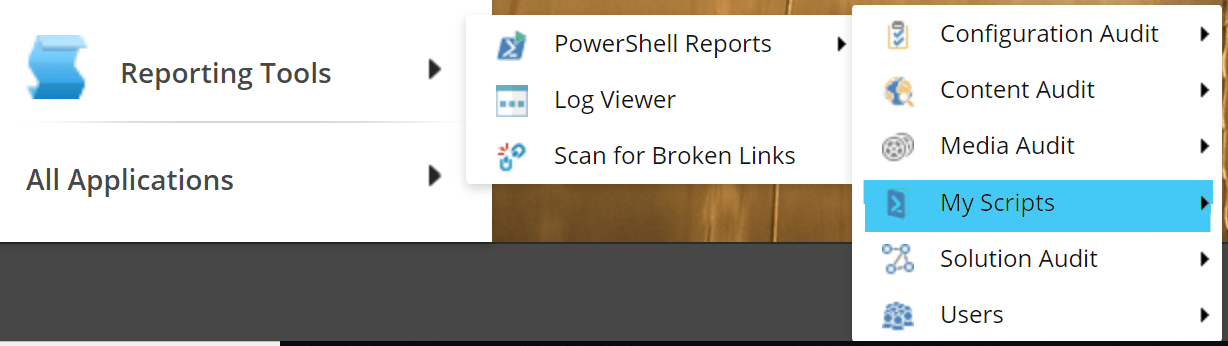
Make sure the new sub-menu has been created in the Reporting Tools Start menu. Open the Start menu in Desktop Mode, and open Reporting Tools → PowerShell Reports. You should see the new sub-menu with the name you entered in the previous step.
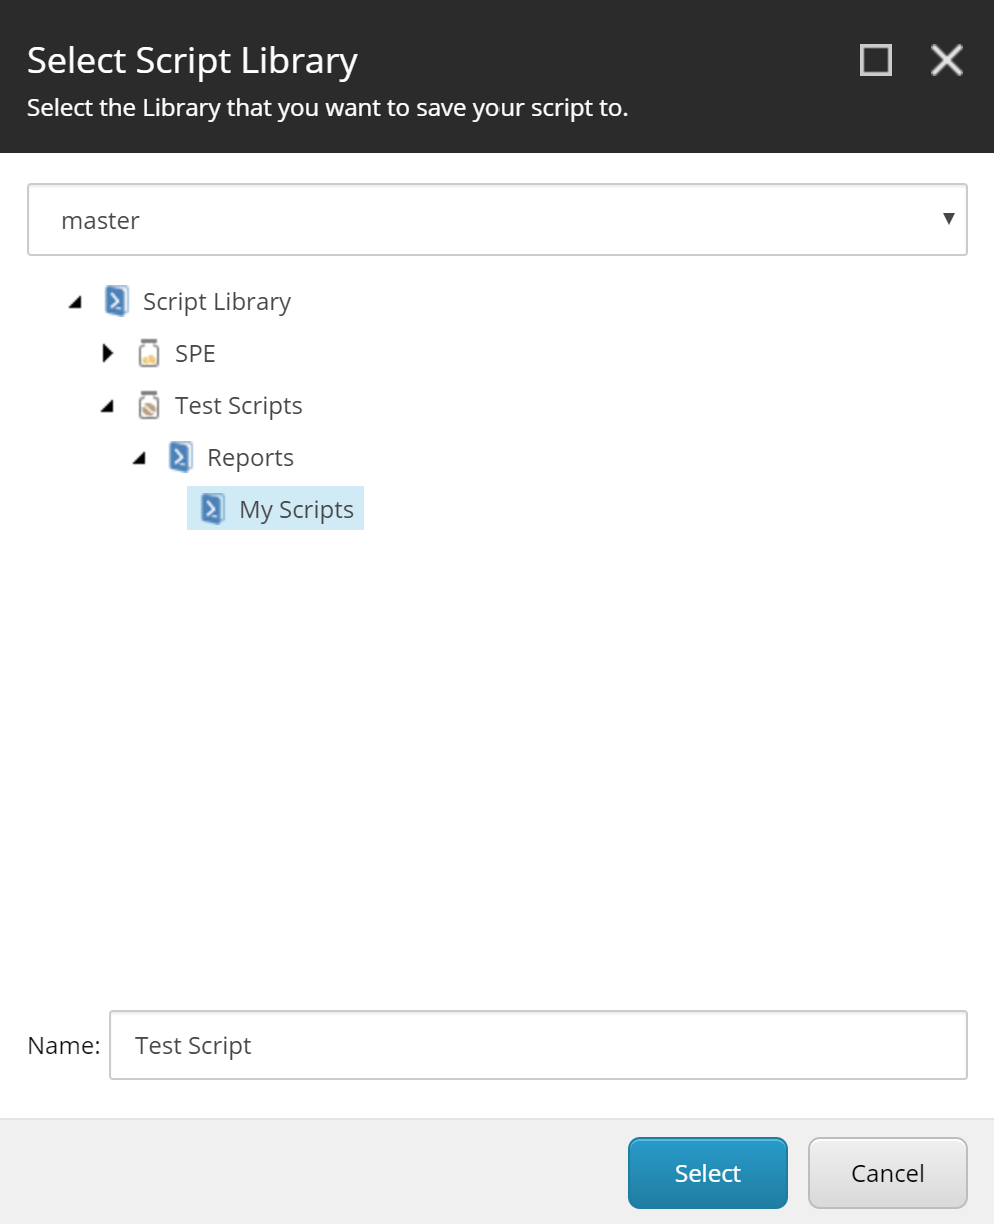
Open the PowerShell ISE and create any script. Test it and save it under the new library created in this tutorial (in this example, under
ScriptLibraryTest ScriptsReports/My Scripts)
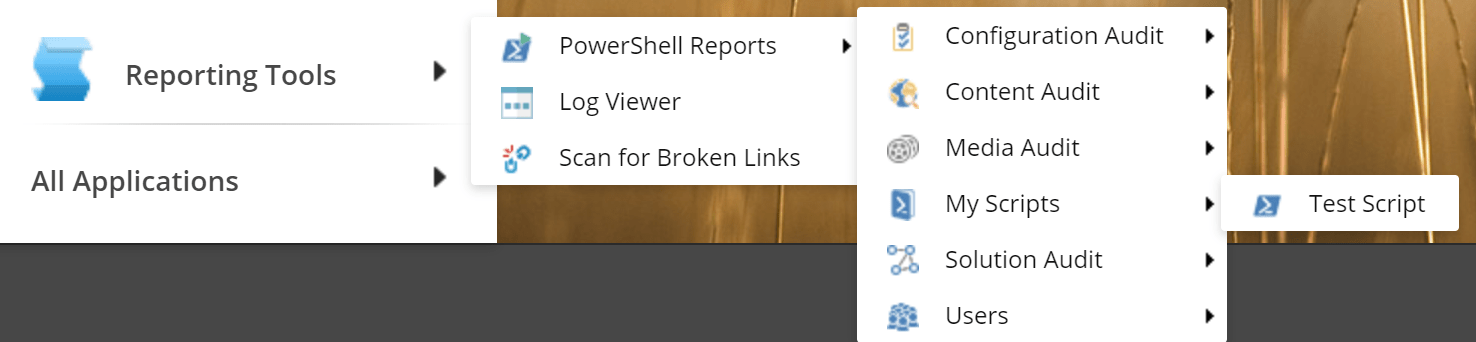
After saving, open (in Desktop mode) the Start menu → Reporting Tools → PowerShell Reports → [Your script library] (“My Scripts” in this example) → [Your script] (“Test Script” in this example). This will run your script.


This site is protected by reCAPTCHA, and our Privacy Policy applies.