How to Create a tvOS App


Apr 04, 2016
I've noticed that many companies with great content somehow fail at providing commensurately great apps, websites and infrastructure that we as consumers expect today. Beachbody is to me a prime example of the kind of company that needs help with this and for whatever reason has not chosen to go down this road yet. As a P90X3 user, I’m not thrilled that I need to use DVDs and that there isn’t a proper app for my Apple TV.
I decided to take matters into my own hands and build a tvOS app to solve my problem.
Pre-requisites:
- MP4s for every workout
- PNGs for every workout
- Mac with XCode
- Apple TV. Must be a 4th generation device or better
- Apple Developer Account
- Background images (1920x1080)
Getting started on XCode:
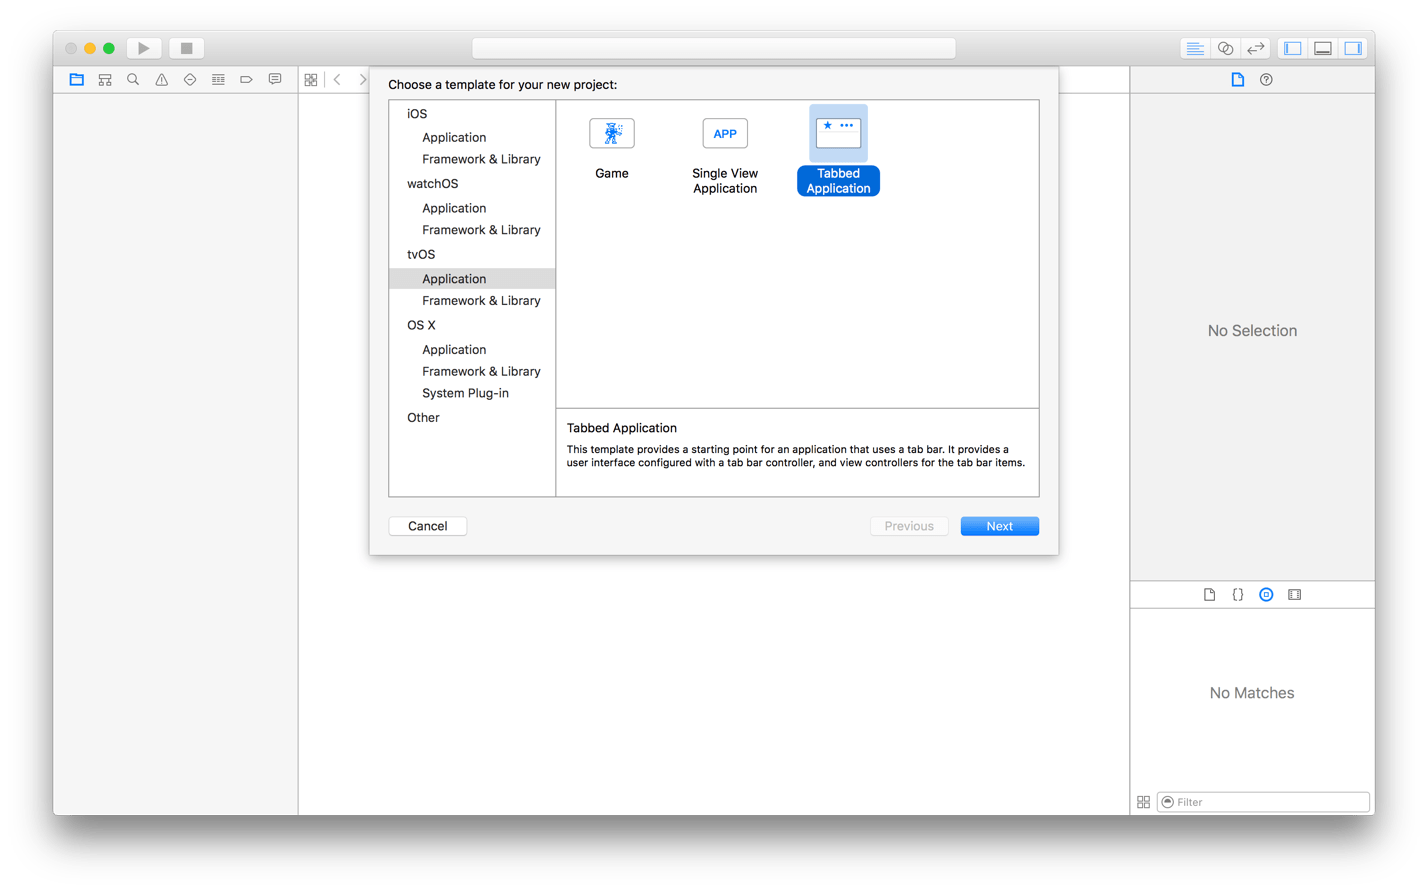
Create a blank tvOS App. Select the Tabbed Application.
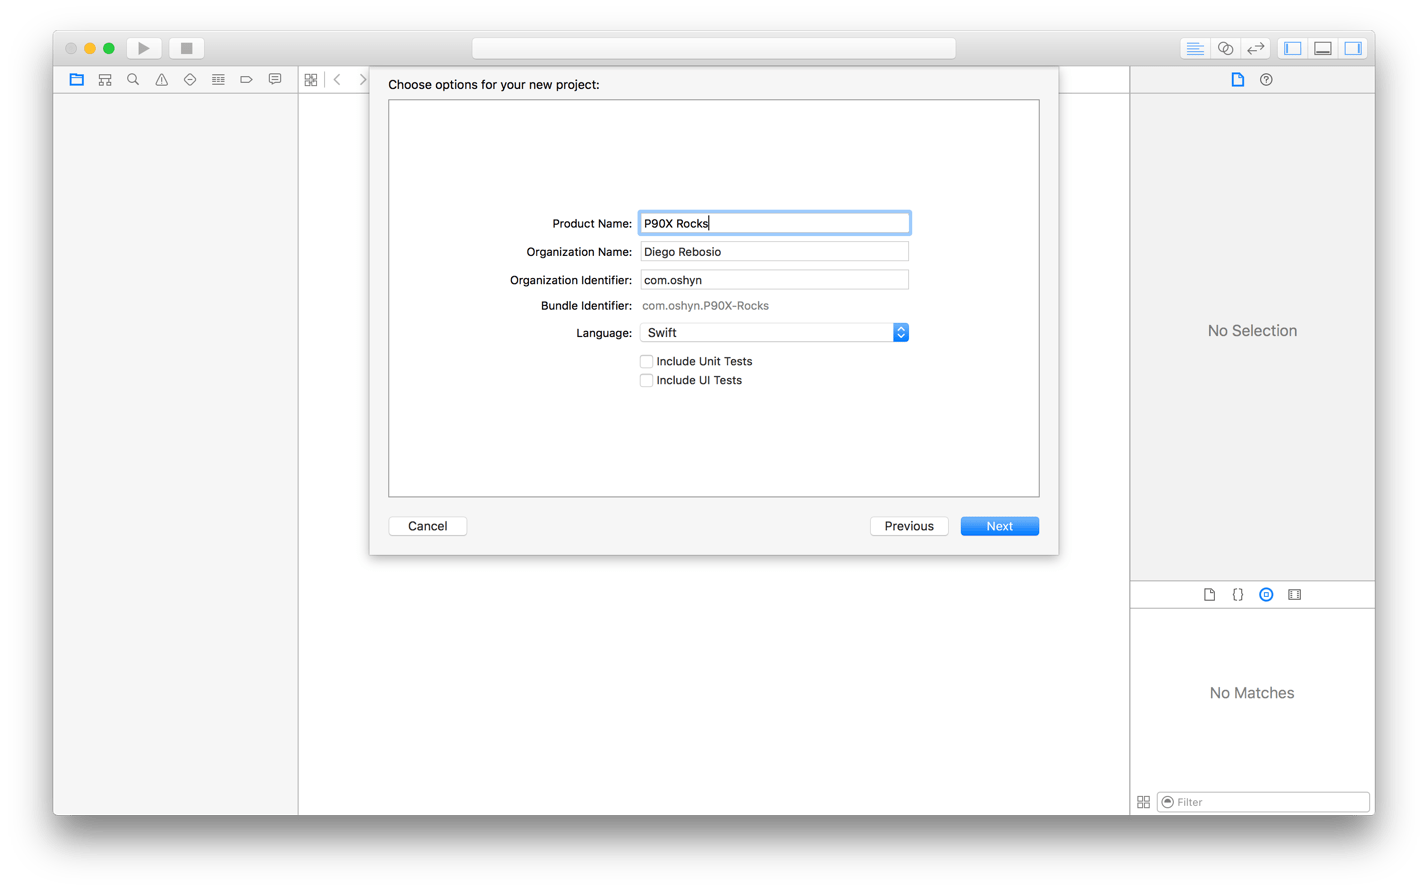
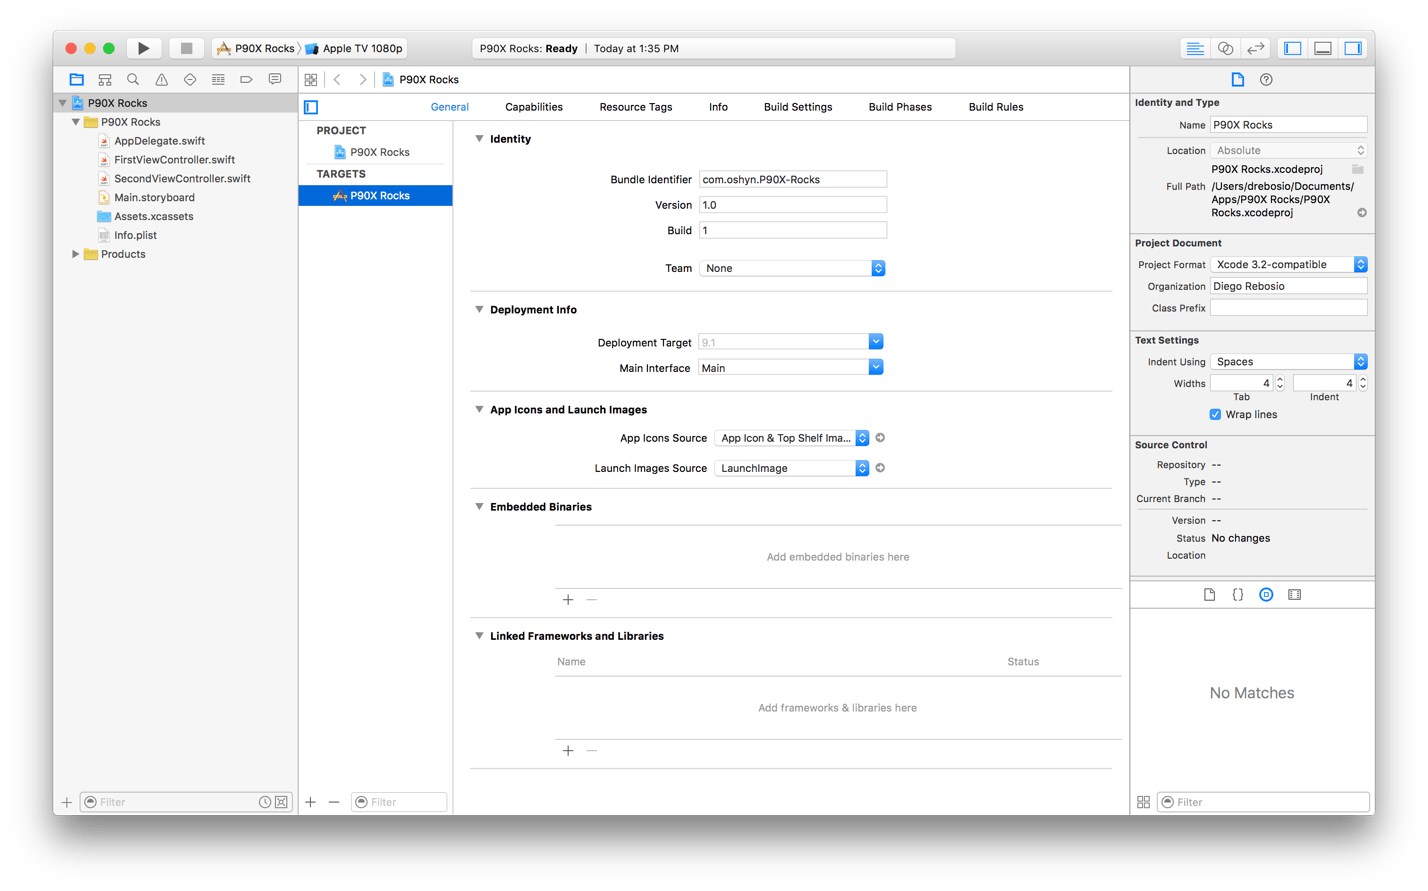
Your screen should now look like this.
If you’d like you can run the app at this point which will run a skeleton app on the emulator.
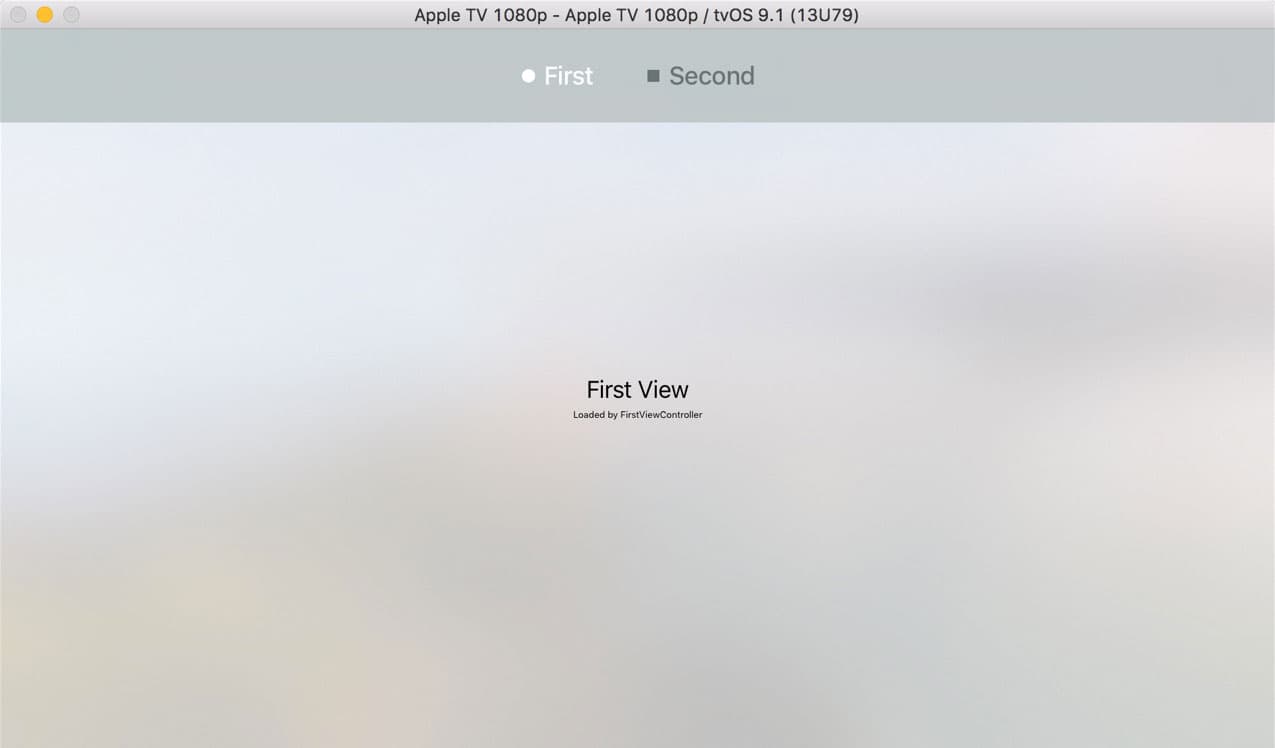
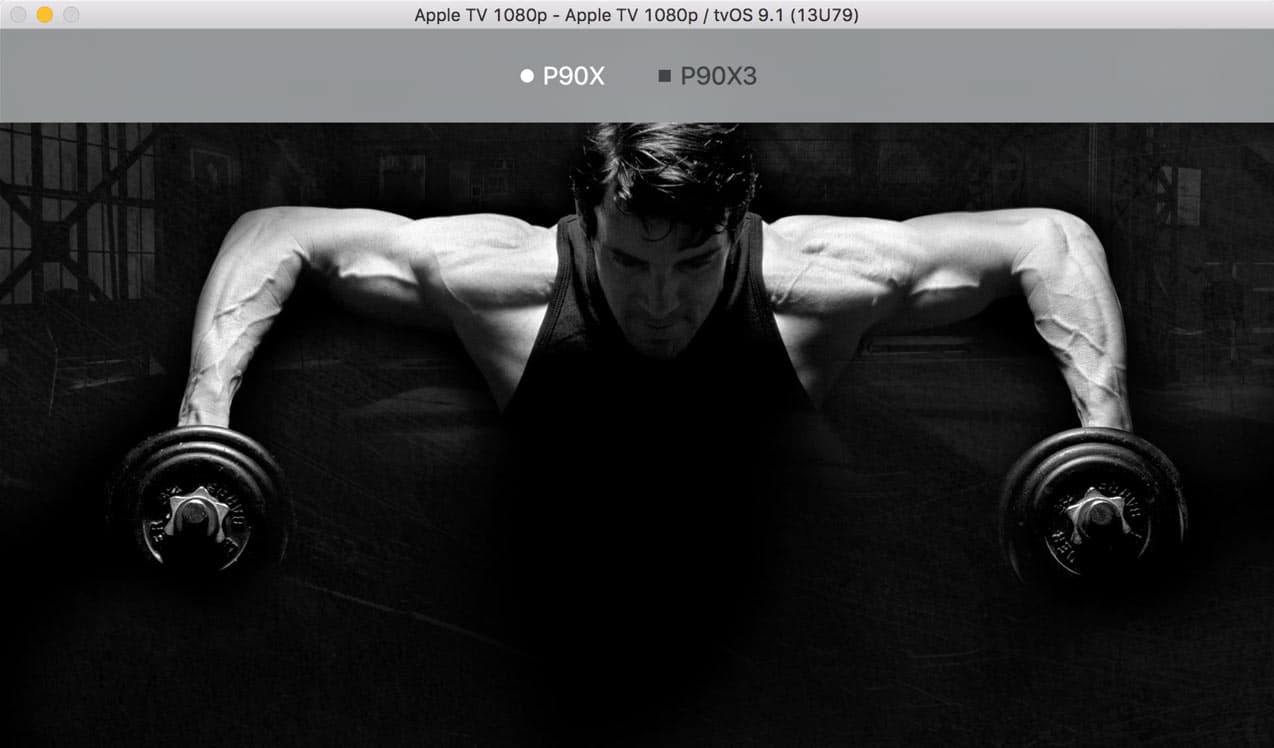
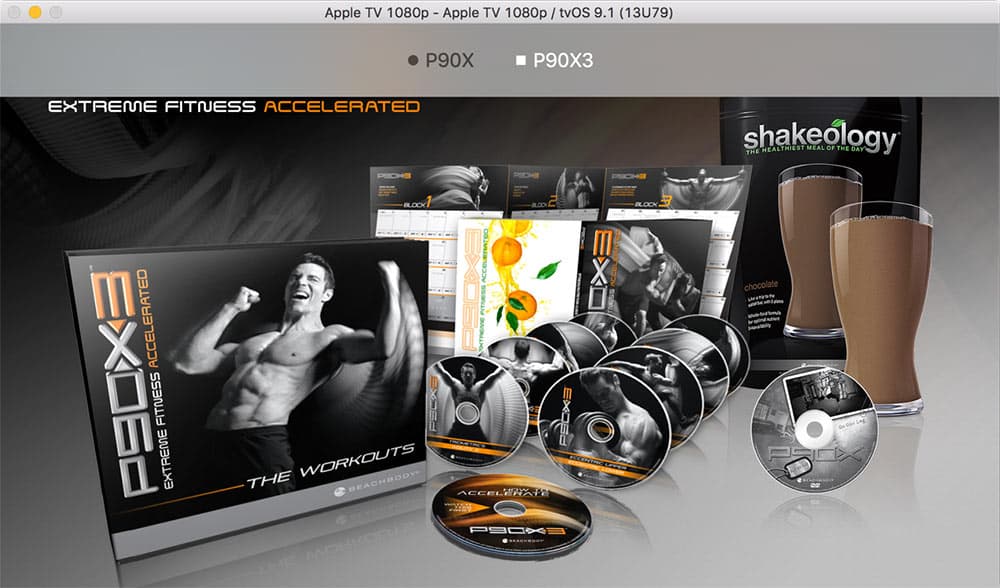
Since I have both P90X and P90X3, I’m going to put P90X in the first tab and P90X3 in the second tab which will you will see in my images below, but you may only be working with one.
Setting the backdrop image:
Select the main story board file on the left to reveal Interface Builder.
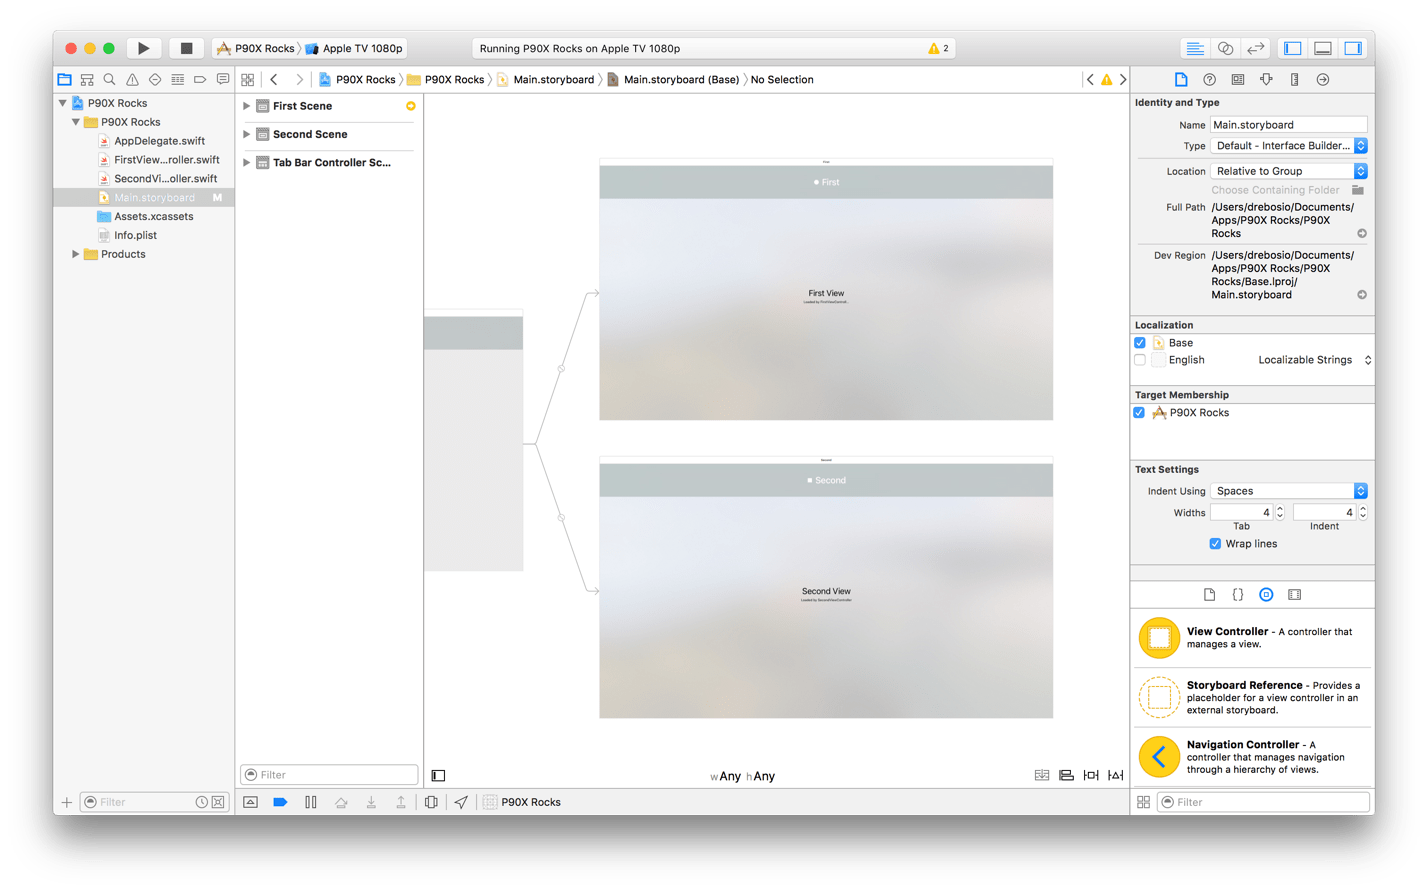
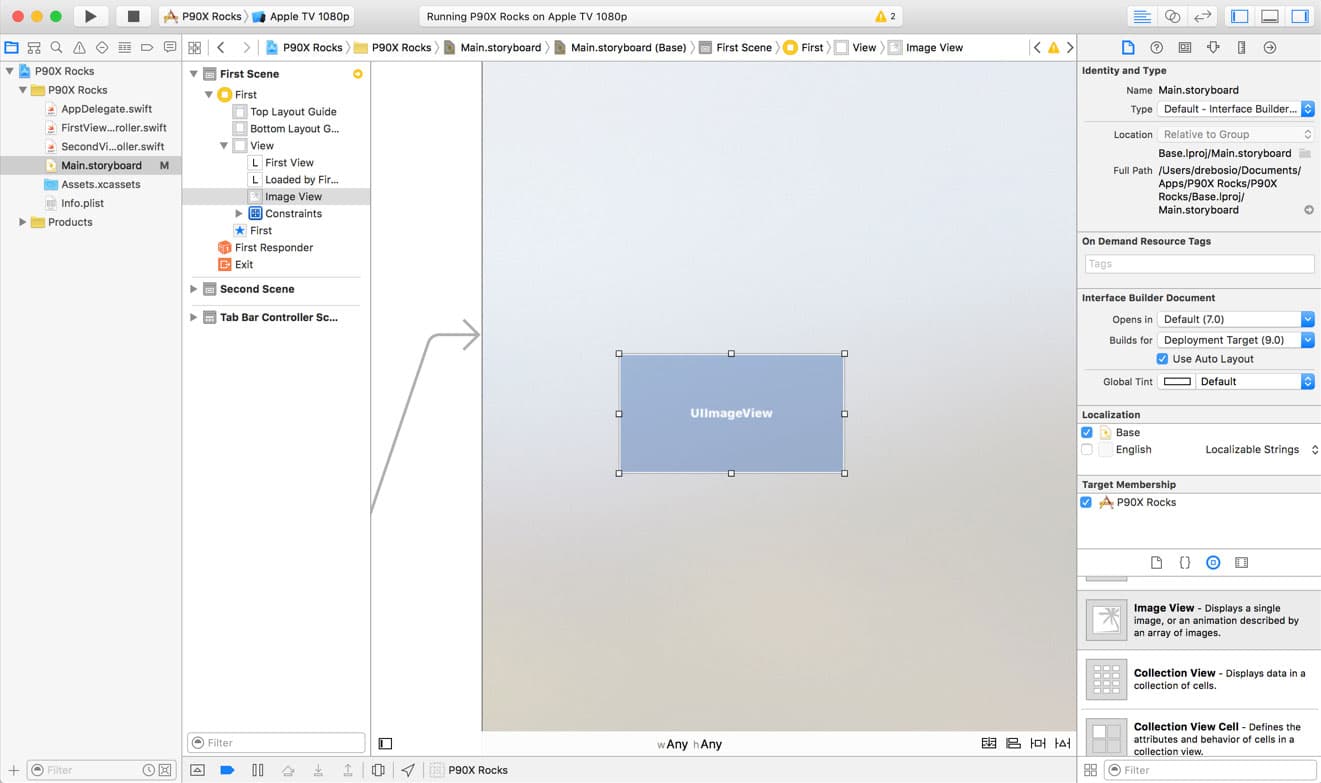
Now grab the edges on the top left and bottom-right corners to fit with the entire view controller.
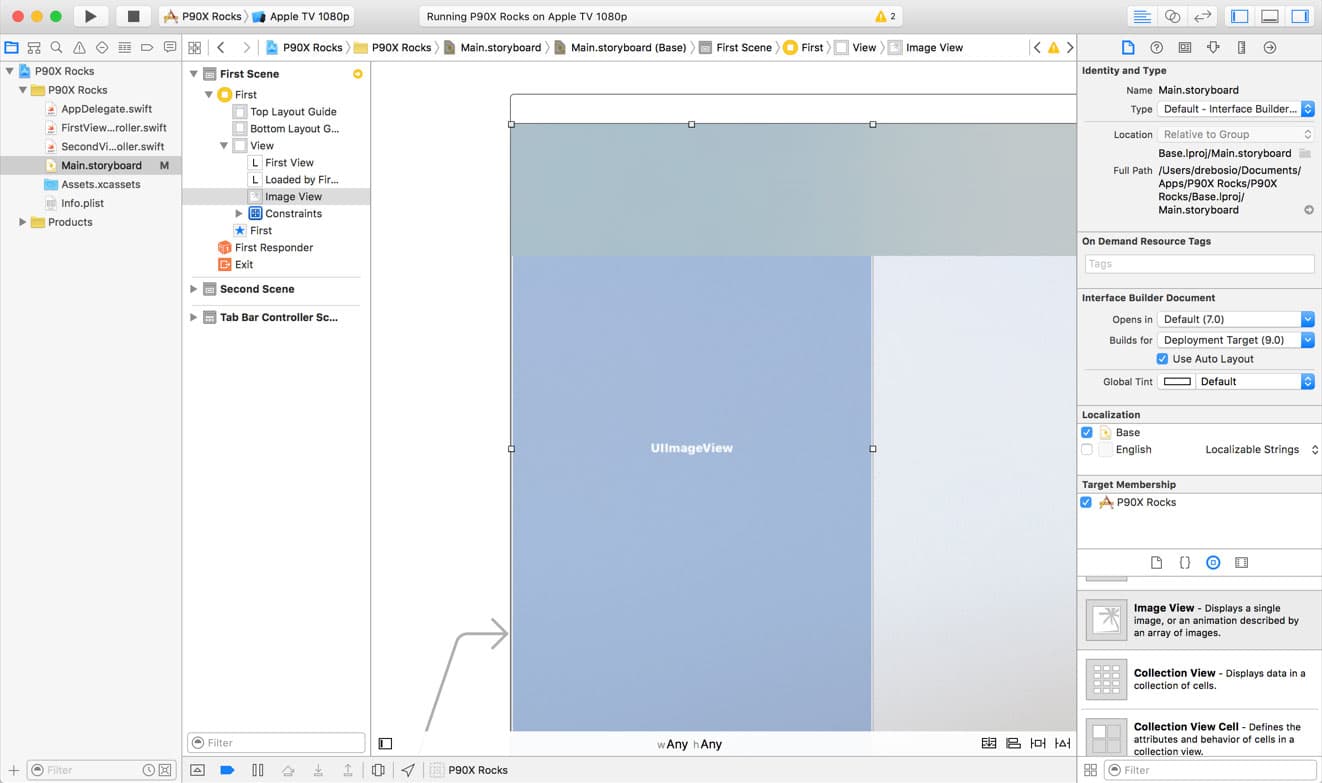
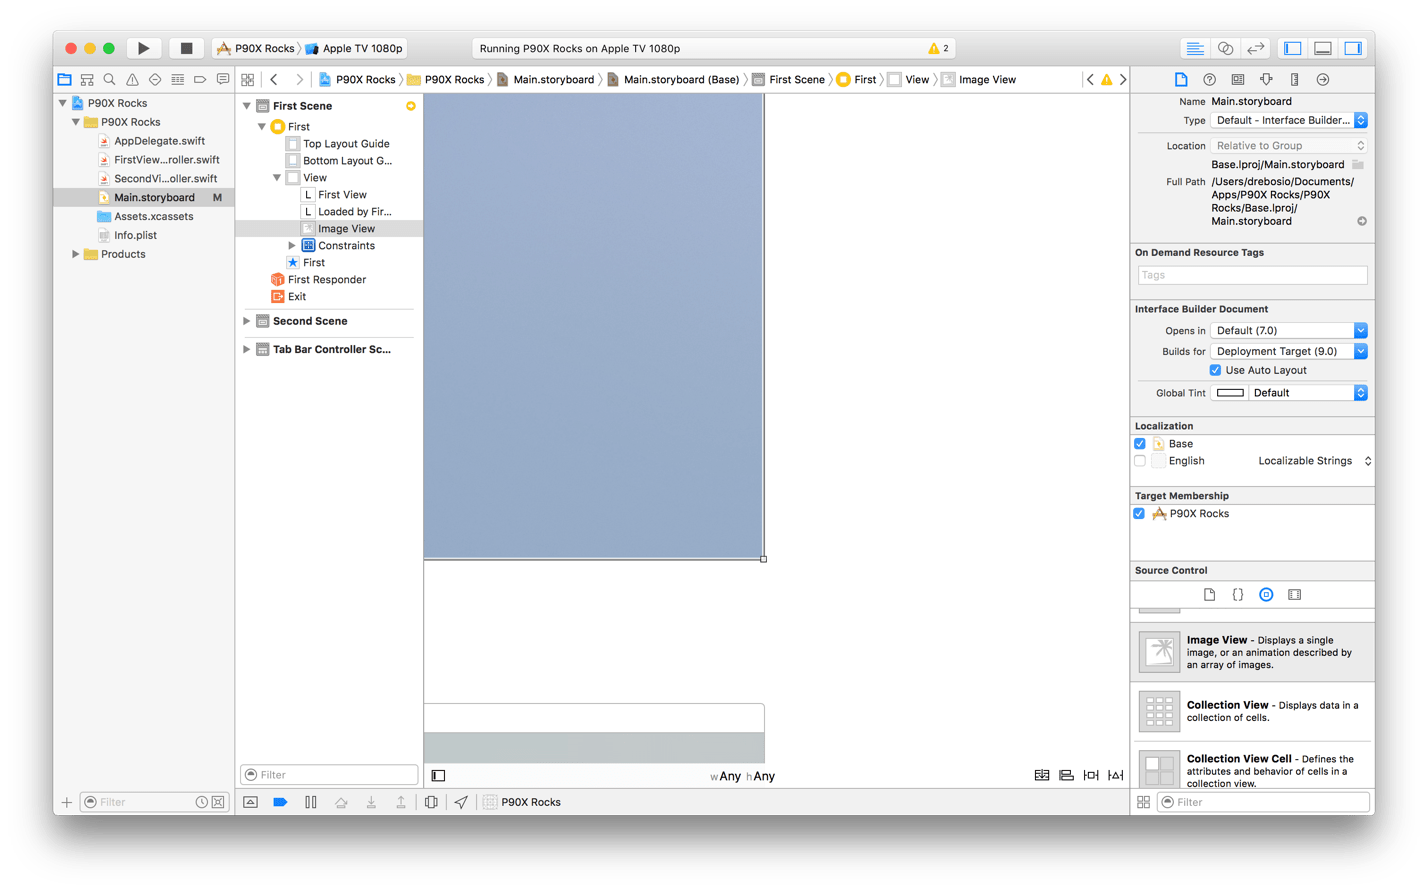
Control-drag from the image view to the parent view to reveal the auto-layout menu. Then select leading space, trailing space, vertical spacing to top layout and vertical spacing to bottom layout (shift-click 4 times to select all of them at once). This will make sure that your image takes over the entire background of the view controller even if for some reason a different screen size is used.
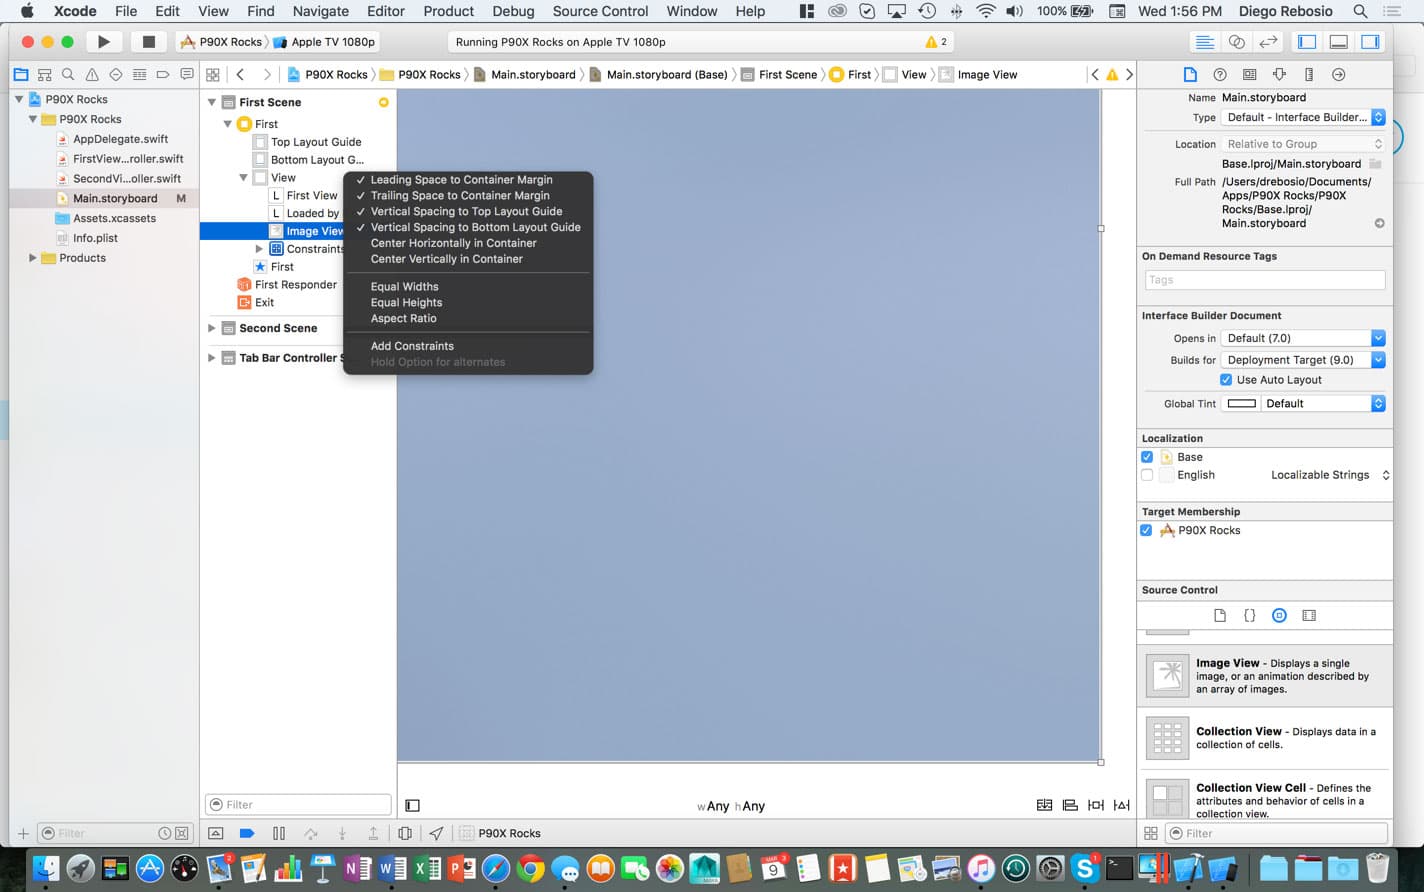
Repeat this exercise for the second scene.
Now is probably a good time to add the background images to your asset library. Select Assets.xcassets on the navigator on the left. Then drag-drop your background images into this.
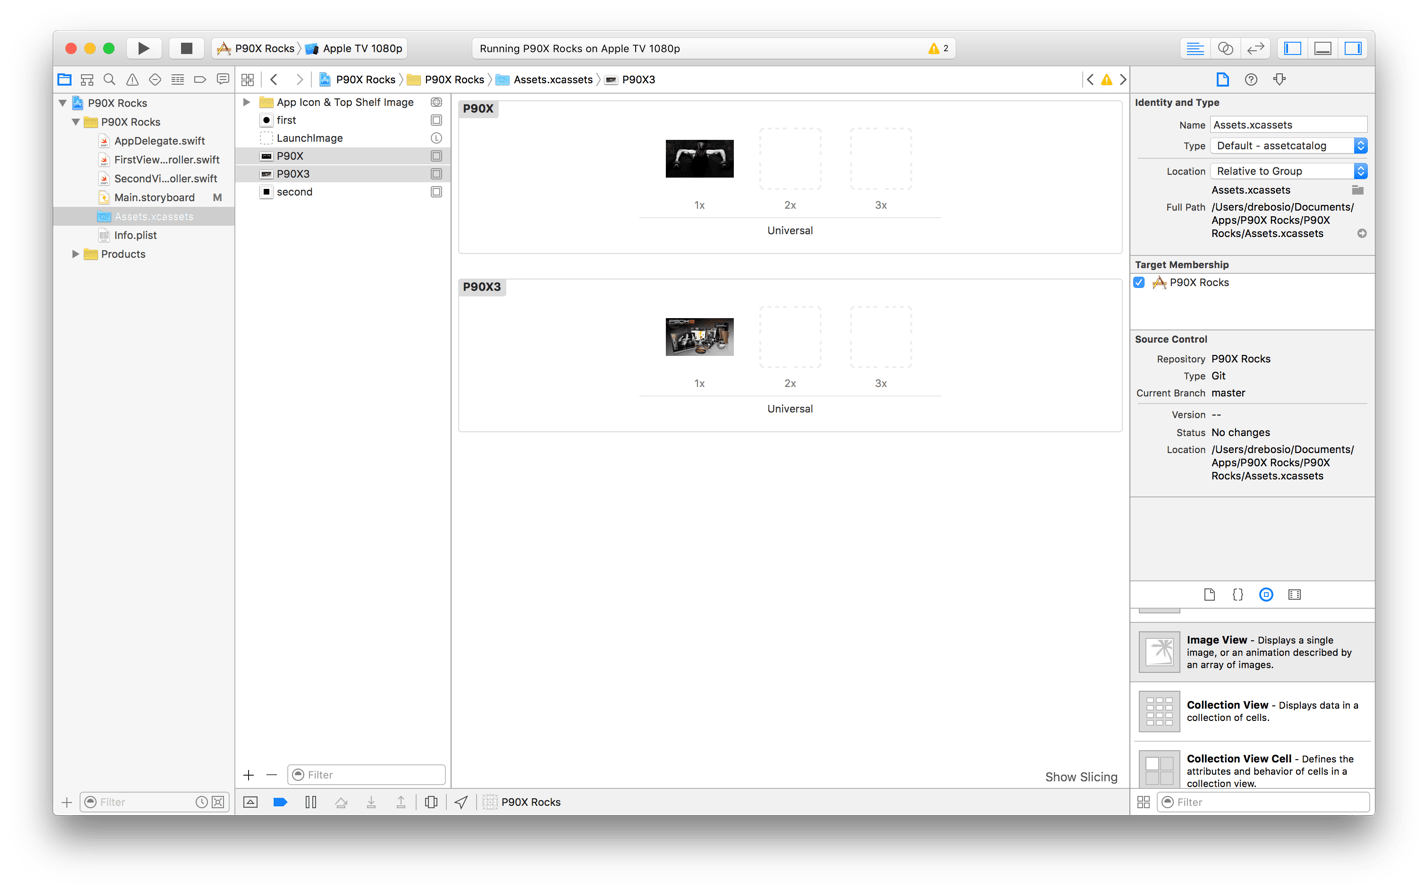
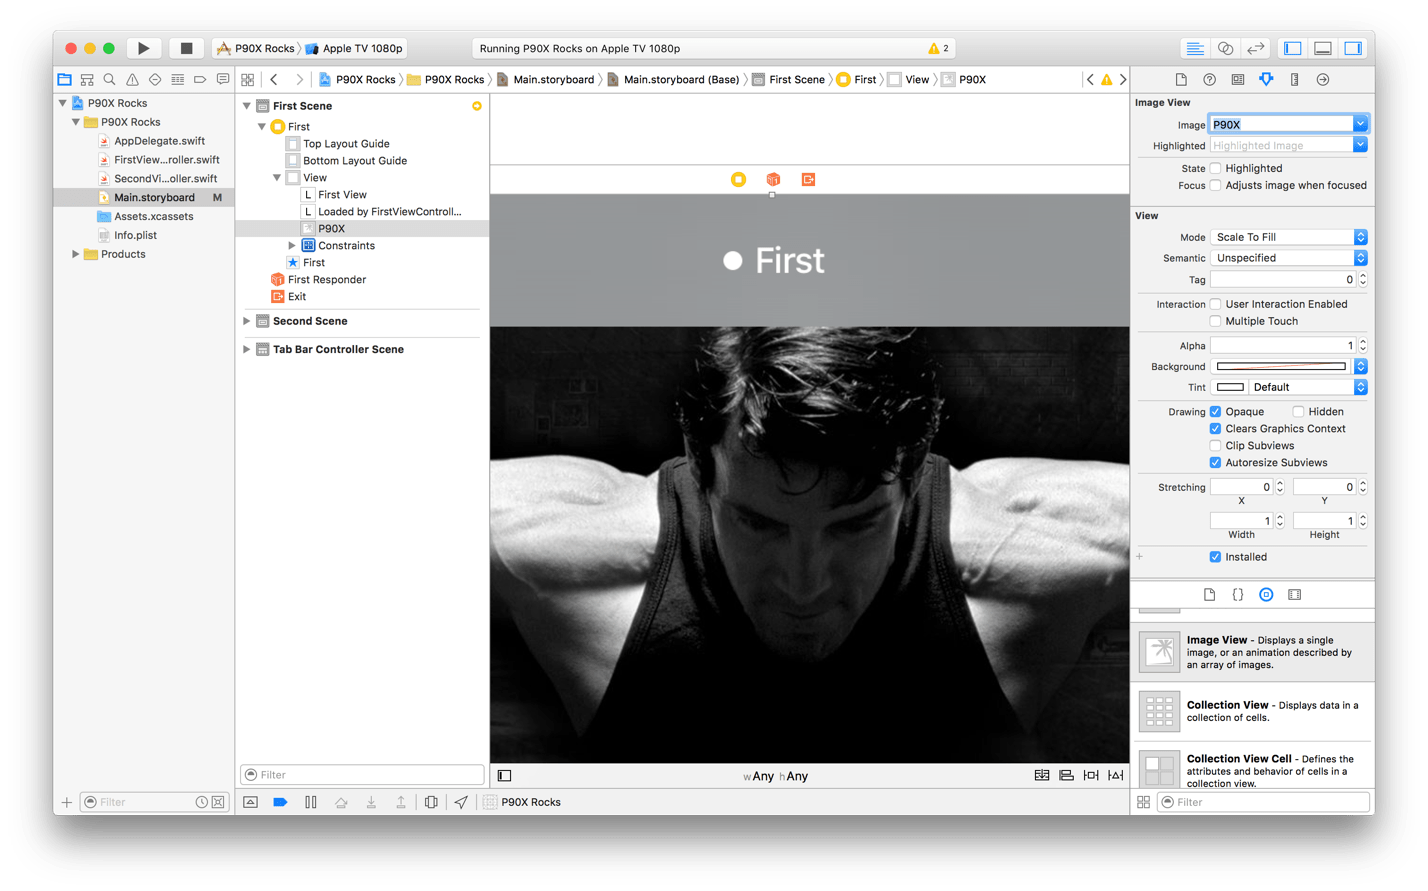
Finally, I’m going to rename “First” and “Second” to “P90X” and “P90X3” by selecting the tab bar item of each view controller (aka scene) and changing the Title.
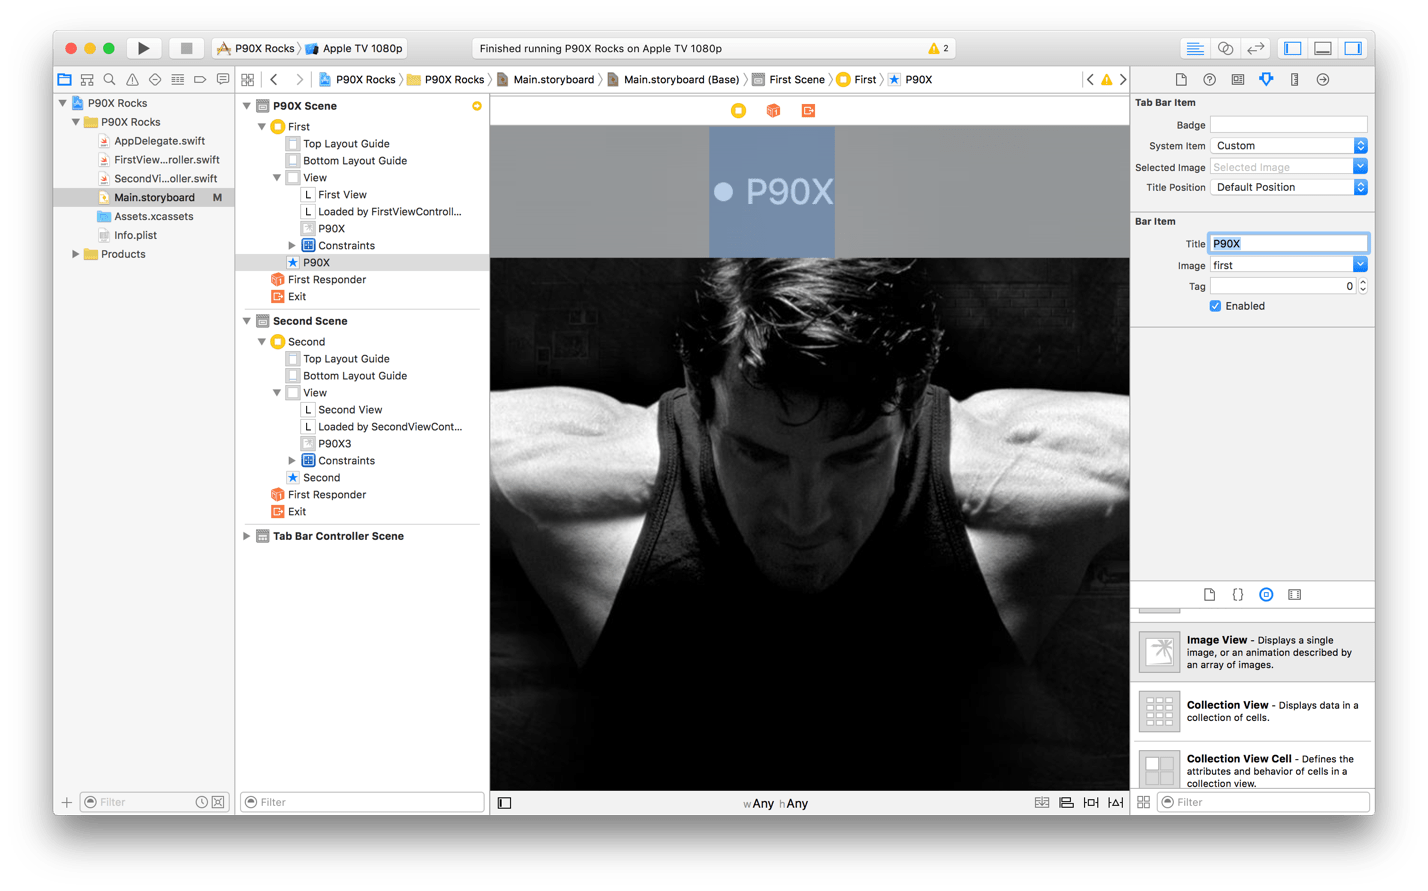 At this point you can build and run, and your app should show the two different backdrops. You can swap between each view by pressing the left/right arrows.
VideoItem Model Class:
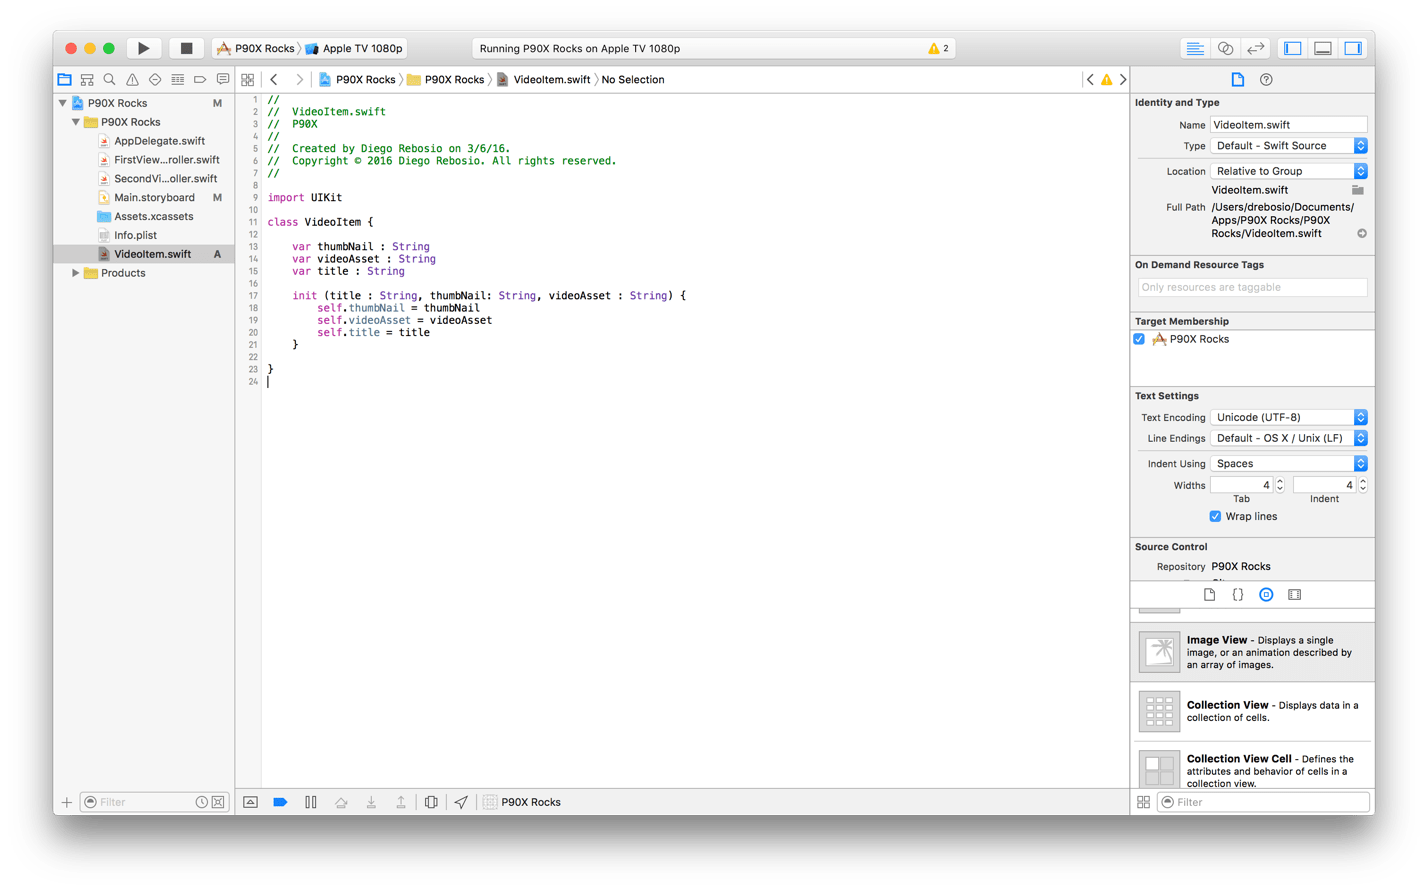
So let’s define a class for what our video model objects will look like. File/New/File/tvOS/Source/Cocoa Touch Class. Name your new class “VideoItem” and make it inherit from NSObject (which you really don’t need) or just select File/New/File/tvOS/Source/Swift File instead.
Then type-in the following:
//

//  VideoItem.swift
//  P90X
//
//  Created by Diego Rebosio on 3/6/16.
//  Copyright © 2016 Diego Rebosio. All rights reserved.
//

import UIKit

class VideoItem {

    var thumbNail : String
    var videoAsset : String
    var title : String

    init (title : String, thumbNail: String, videoAsset : String) {

        self.thumbNail = thumbNail
        self.videoAsset = videoAsset
        self.title = title
    }
}
Our class will be pretty simple. It’ll just hold a title for the workout, a thumbnail file name and a video asset file name. We specifically break this out into its own class in case we want to expand things in the future and to keep it all clean, but for the purposes of this demo, this class simply holds those 3 fields. We also create a simple constructor so that it’s easy to instantiate new Video Items and we have no null fields.
Overriding First and Second Scene View Controller Logic.
Our two view controllers are really going to be doing the same thing, so I think it’s a good idea to combine them into one class. In brief, we’re going to create a UICollectionView where we will show the videos, allow the user to flip around to find the video they want, and then press on the remote to view the video.
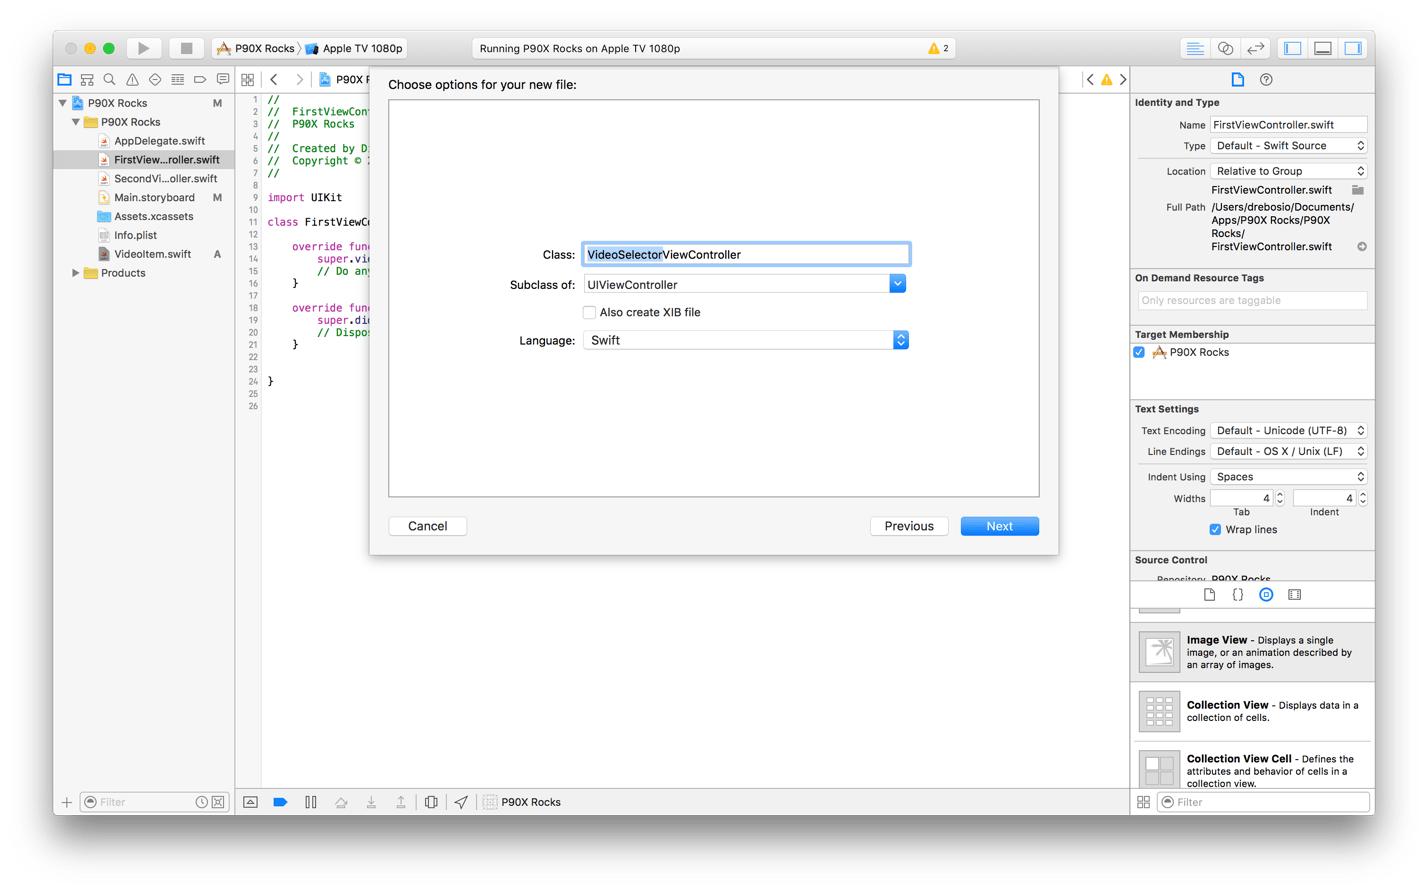
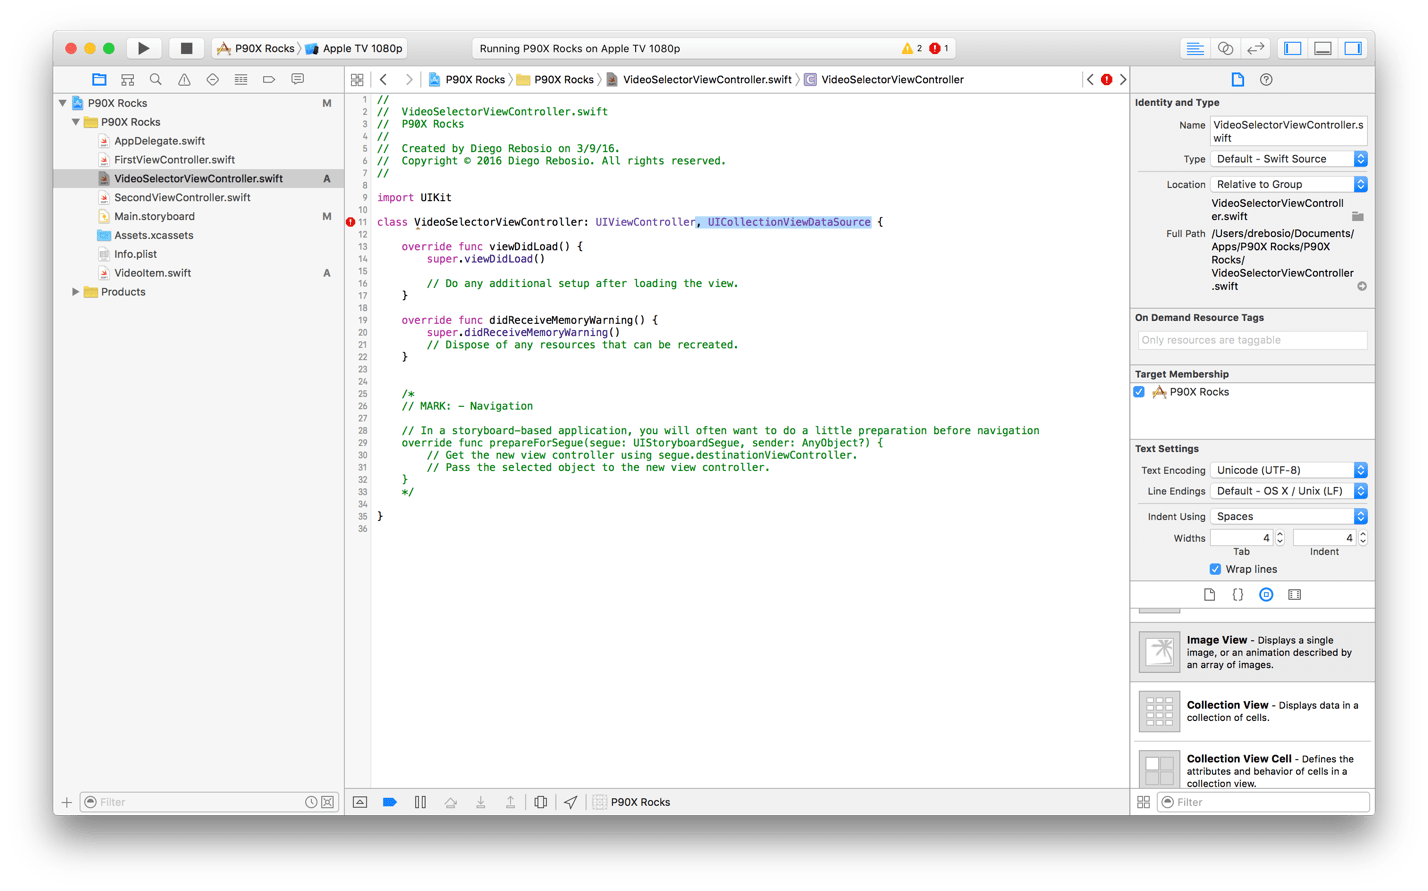
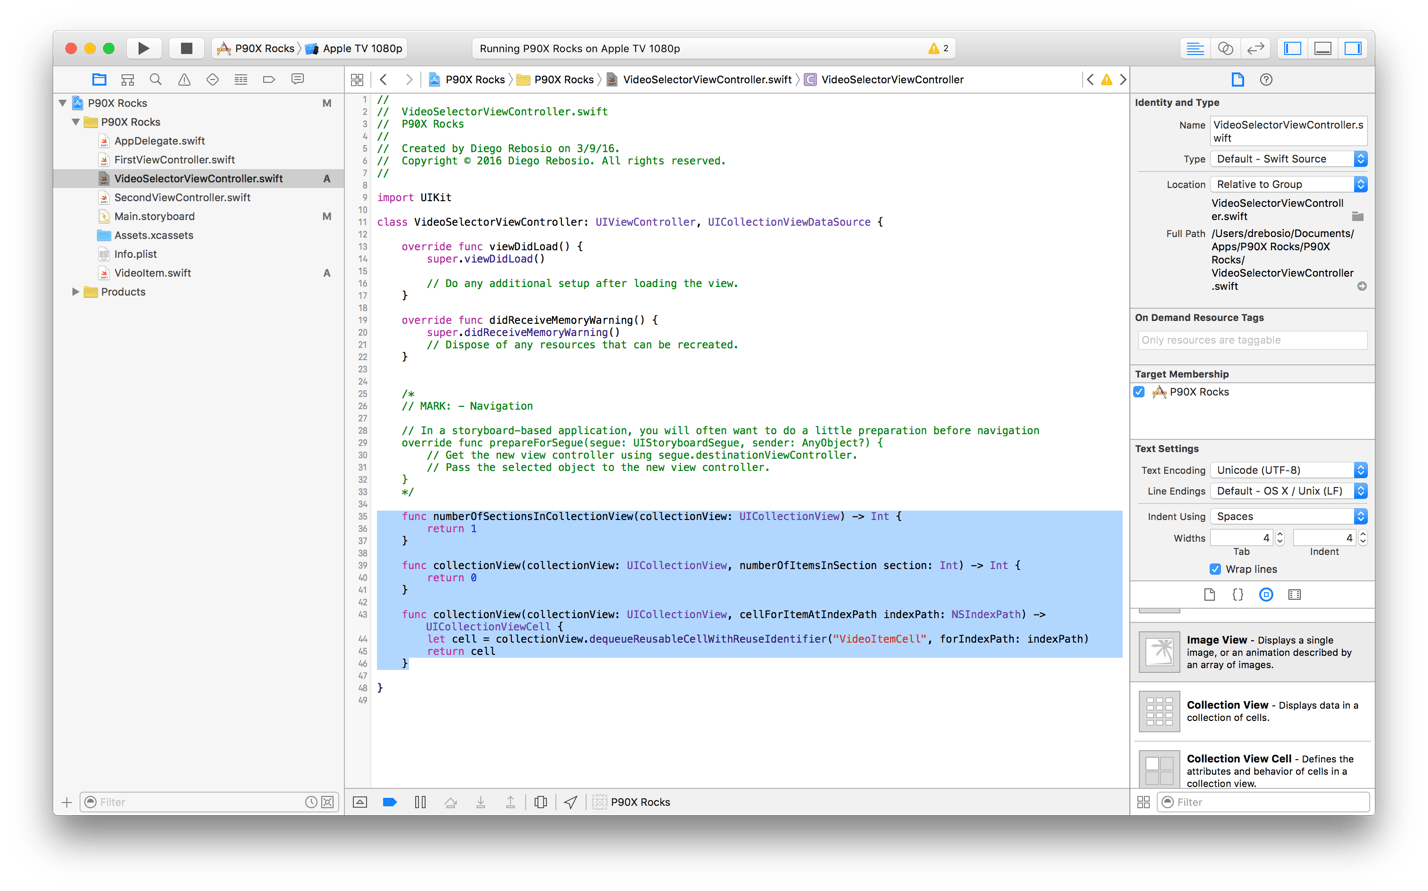
Let’s make a new class and call it VideoSelectionViewController and have it inherit from UIViewController. Then add UICollectionViewDataSource after UIViewController to make it follow that protocol and essentially be able to provide data to the collection view once we create it.
Now add the following code to make sure that our class is doing the bare minimum to comply with the new protocol:
func numberOfSectionsInCollectionView(collectionView: UICollectionView) -> Int {

    return 1
}

func collectionView(collectionView: UICollectionView, numberOfItemsInSection section: Int) -> Int {

    return 0
}

func collectionView(collectionView: UICollectionView, cellForItemAtIndexPath indexPath: NSIndexPath) -> UICollectionViewCell {

    let cell = collectionView.dequeueReusableCellWithReuseIdentifier("VideoItemCell", forIndexPath: indexPath)
    return cell
}
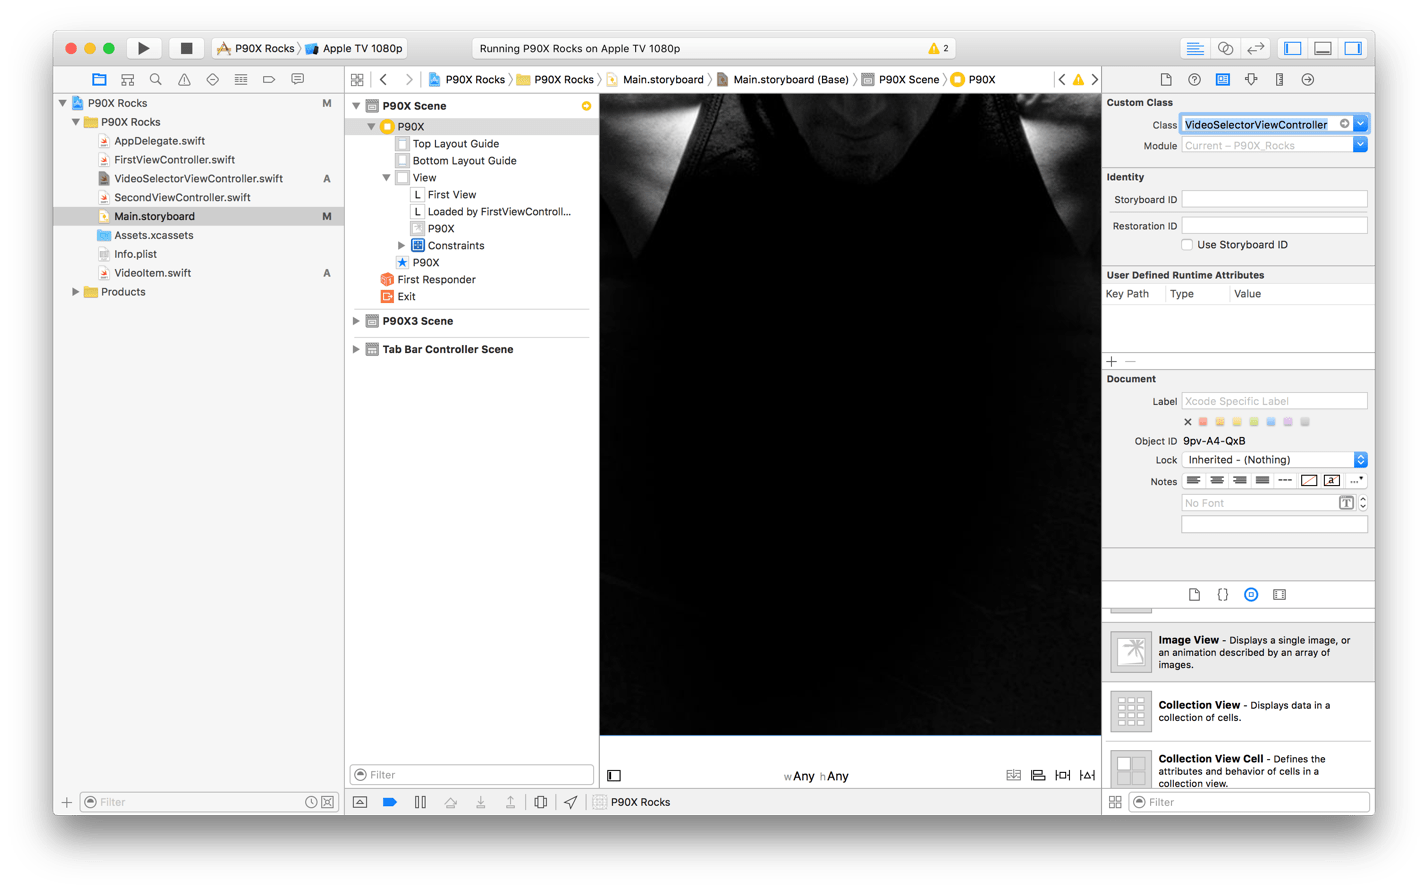
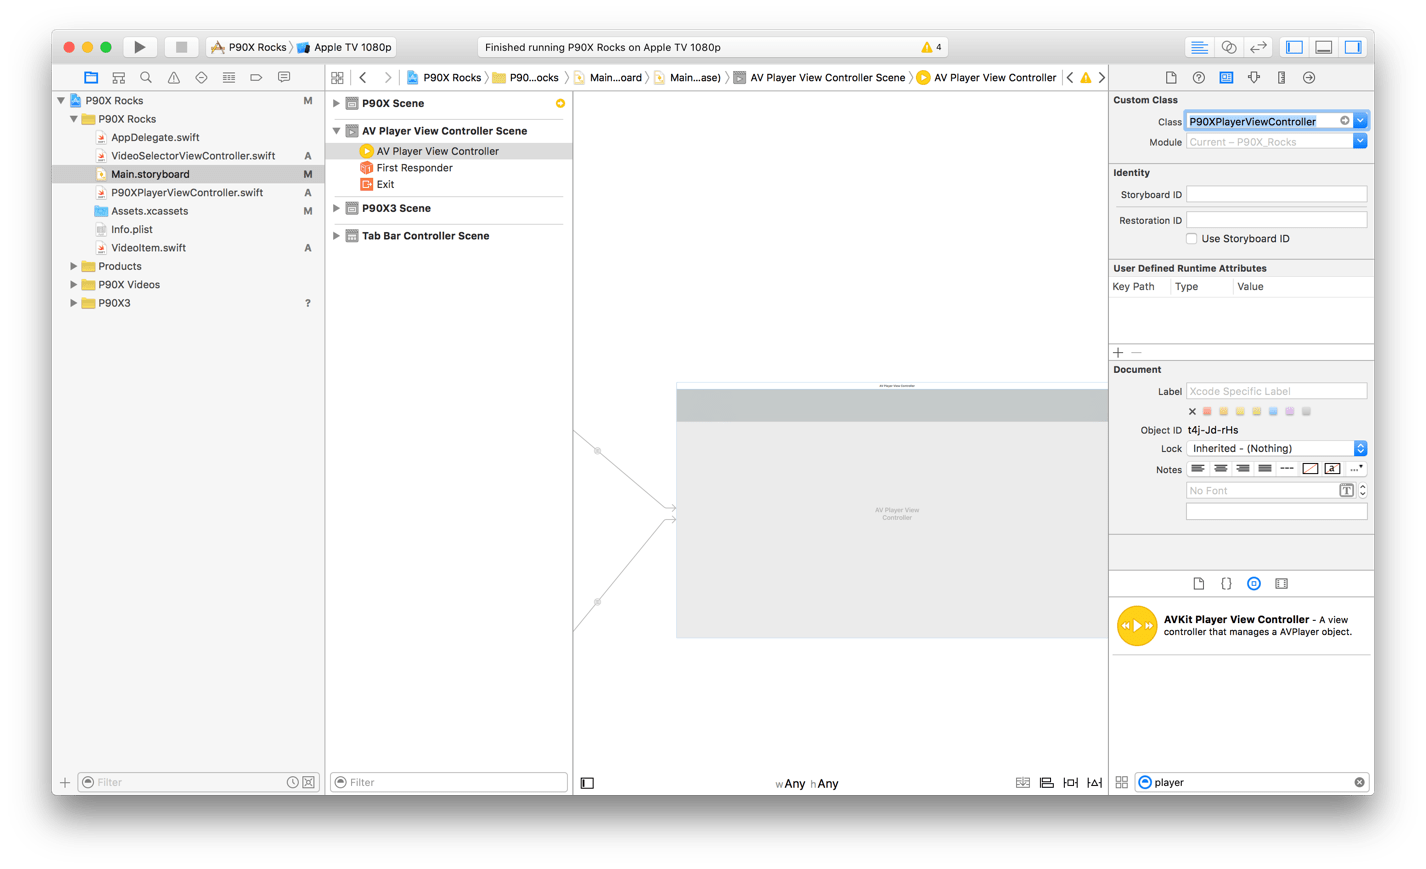
Finally, let’s bind our scenes to the correct class. Go back to the main storyboard, select the scene and change the class:
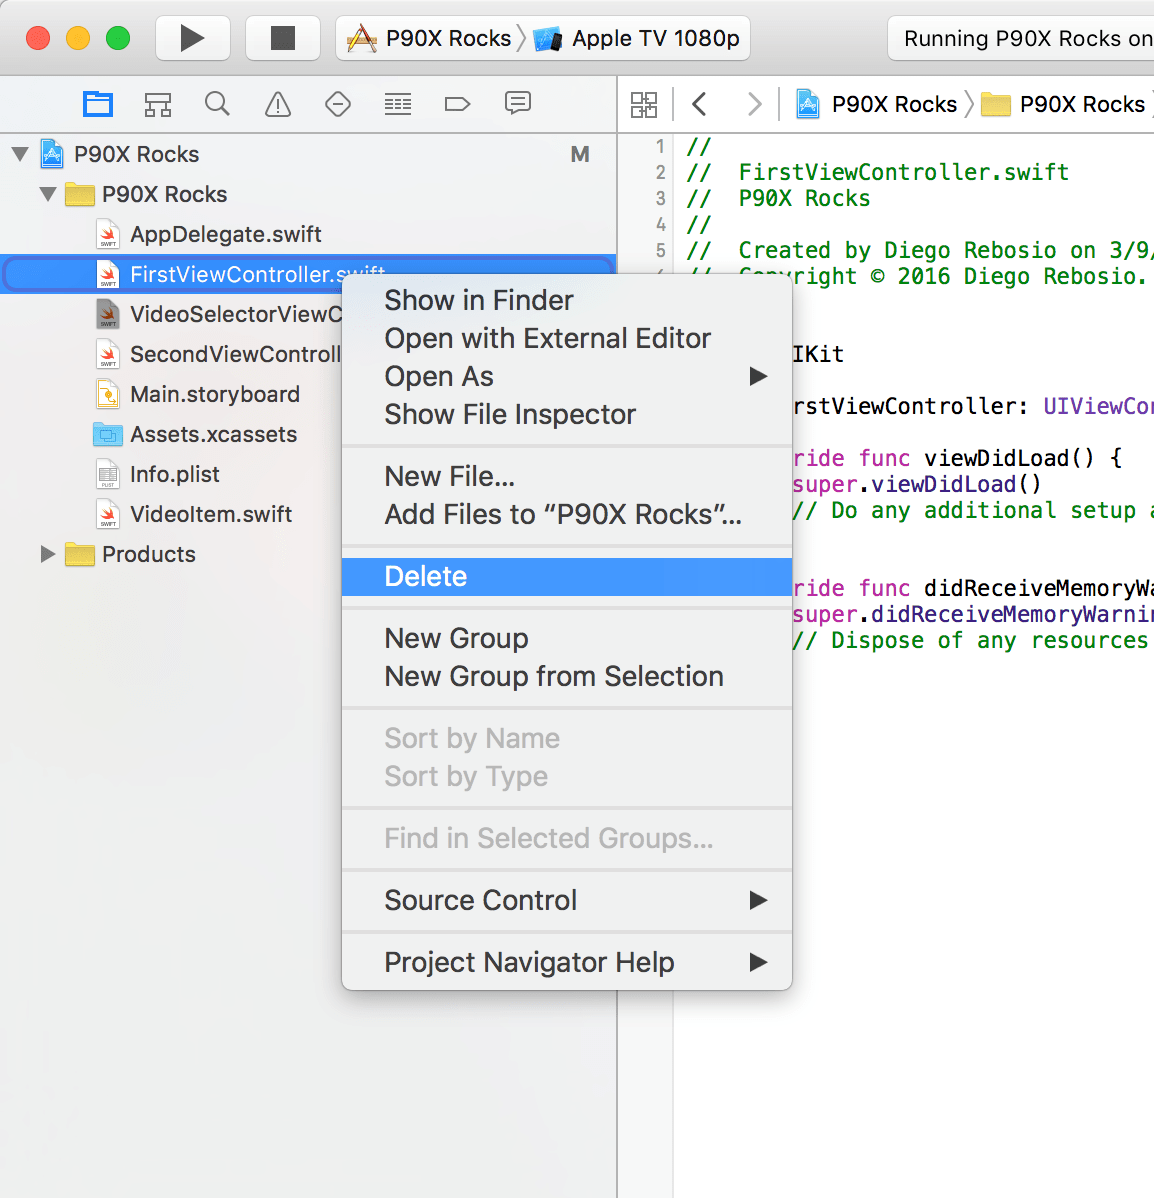
You can also delete the old classes since you no longer need them.
Asset Import
It’s probably a good time now to drag-in your remaining assets.
Go to your Assets.xcassets catalog and drag-in all image assets.
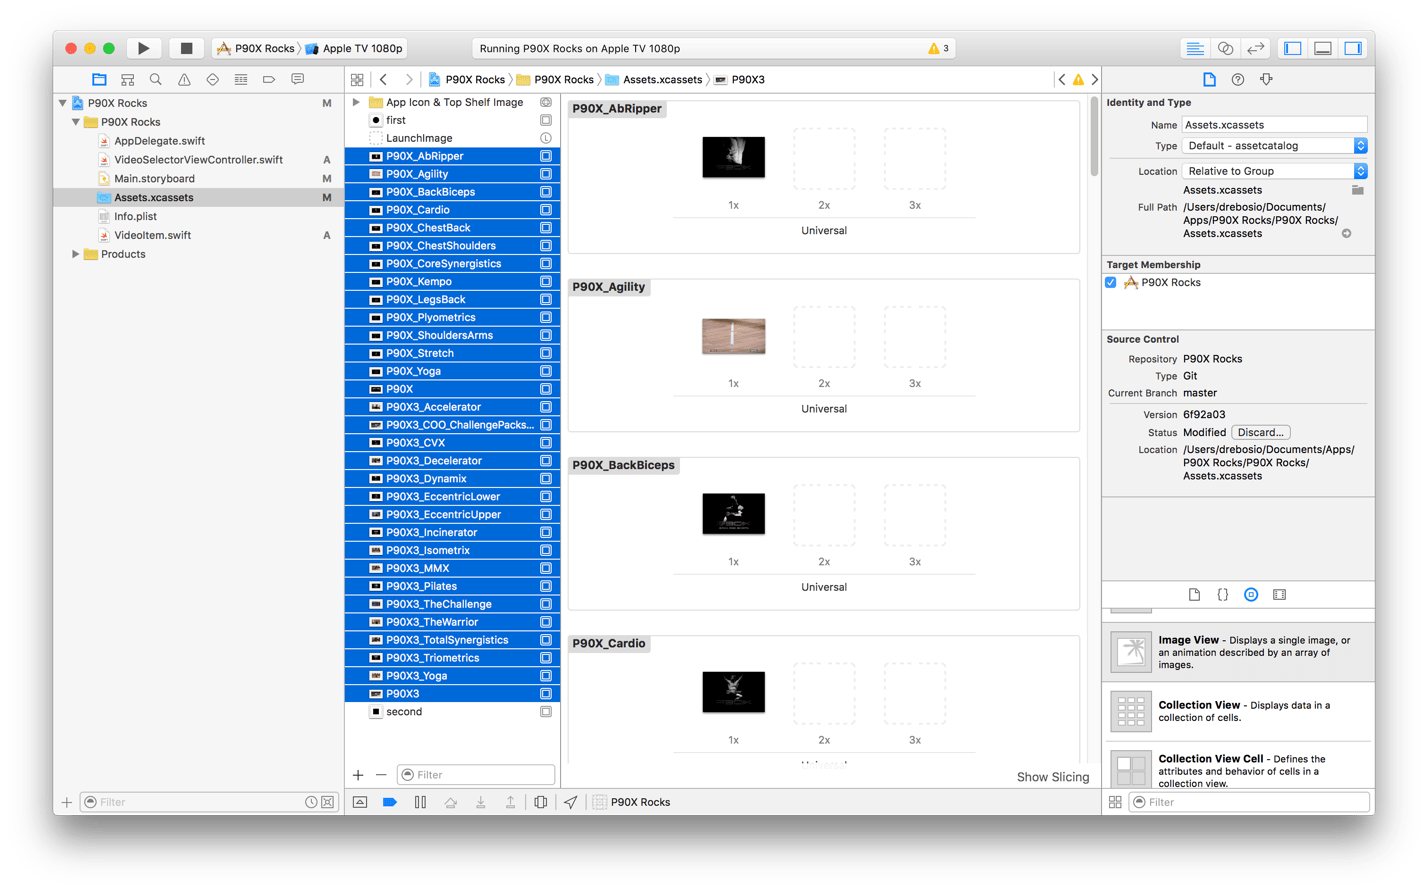
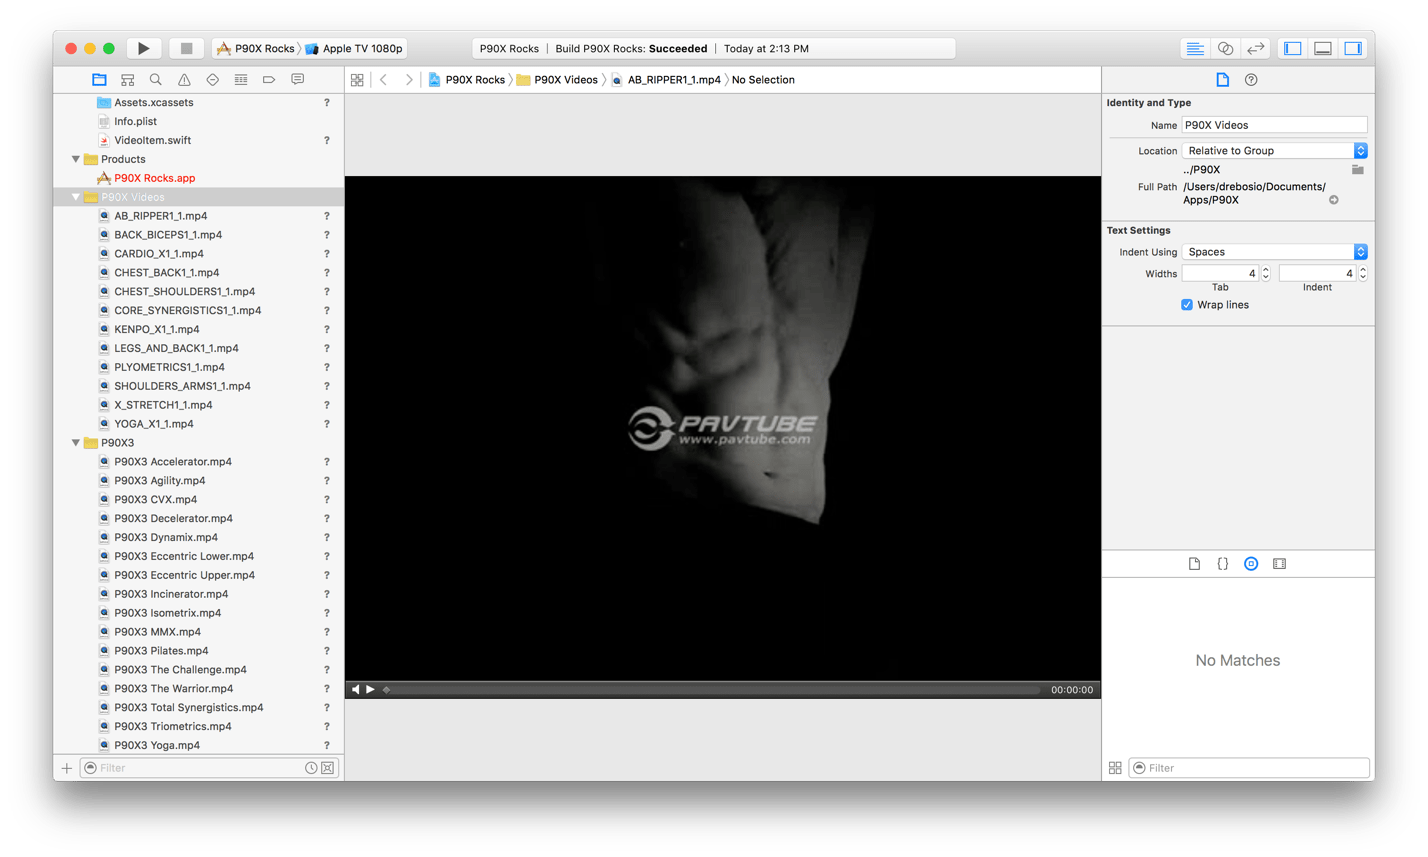
Now let’s add-in your video assets. You can place them anywhere in your tree but I personally put mine inside folders to prevent clutter.
Finally, let’s create our model (sorry this is hardcoded since this is just a demo app). Go back to your VideoSelectorViewController class and we’re essentially going to populate a new array optional (array of VideoItems) with the right video list according to whether we are looking at P90X or P90X3 (we find which we are from the tab bar item where we are naming the screen).
Obviously the right video items will have to match the workout program (or video library) that you are creating.
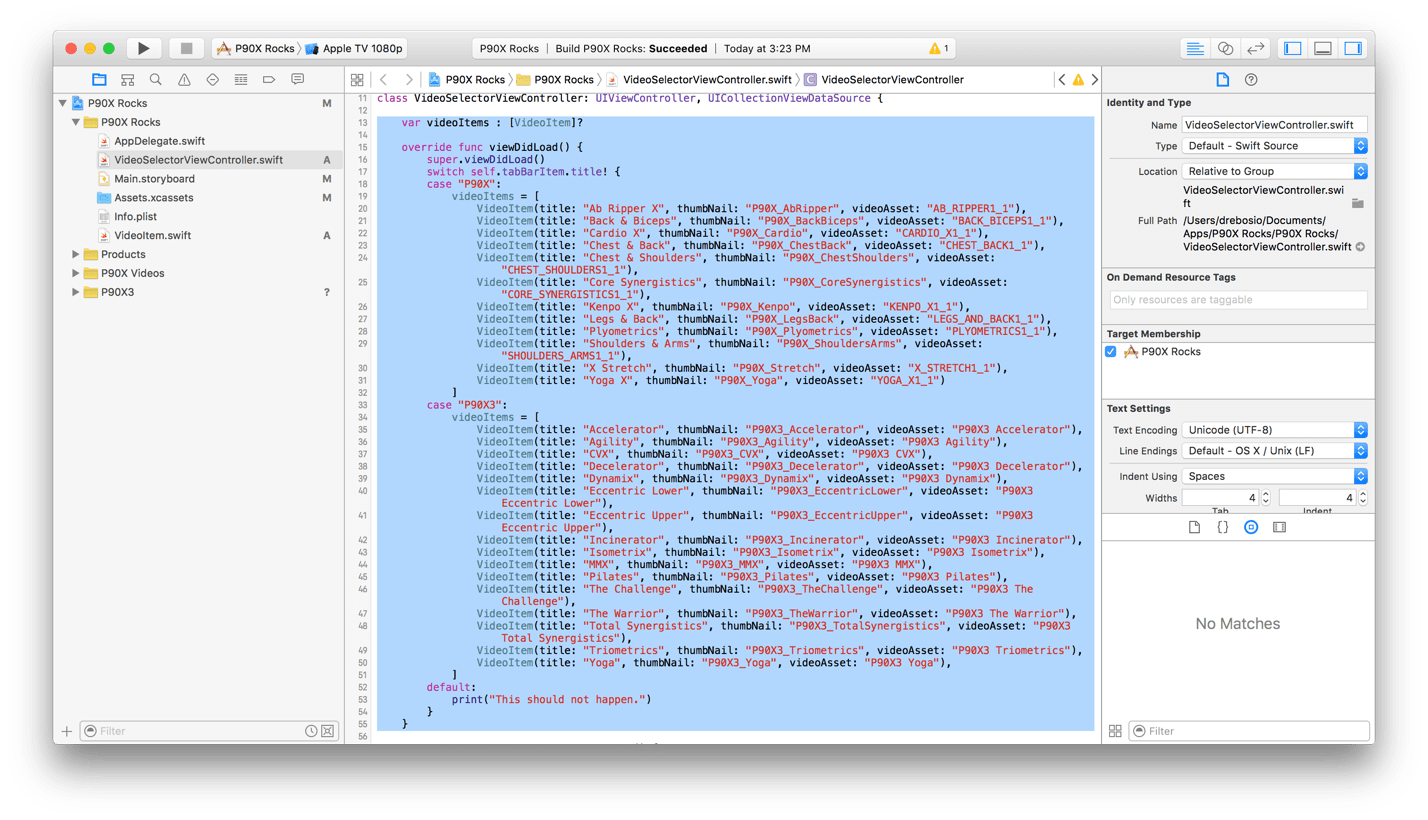
You may want to build and run to make sure nothing is broken, but there will be no difference yet in how things run since we haven’t added the collection view to our story board.
Adding the Collection View:
Go back to the storyboard, and now add a collection view across the bottom. Drag it to take the entire width of the screen. The height is basically up to you. Set the background color to something that makes sense visually.
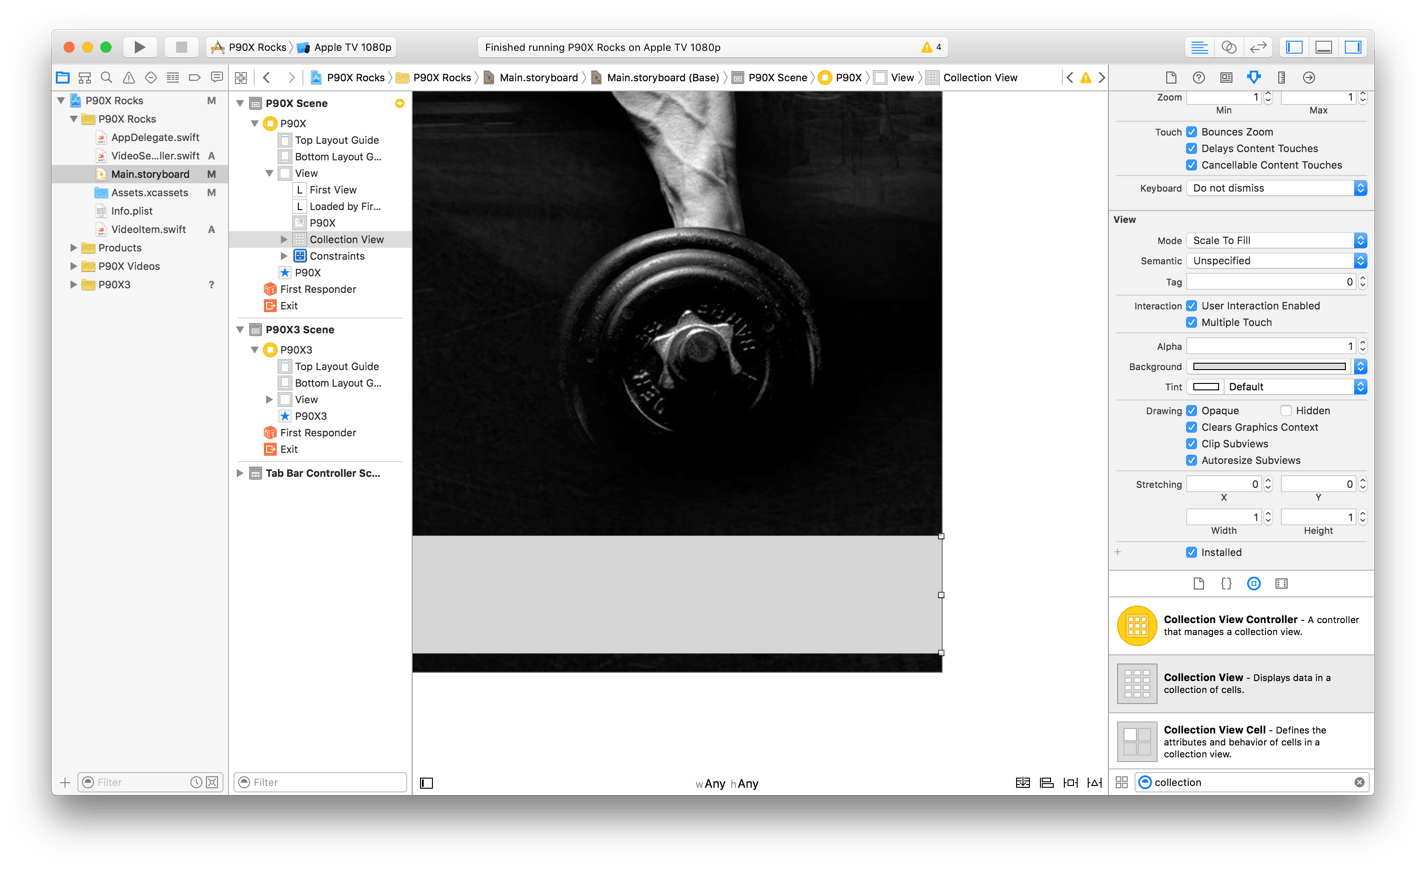
Set auto-layout to keep the collection view in place:
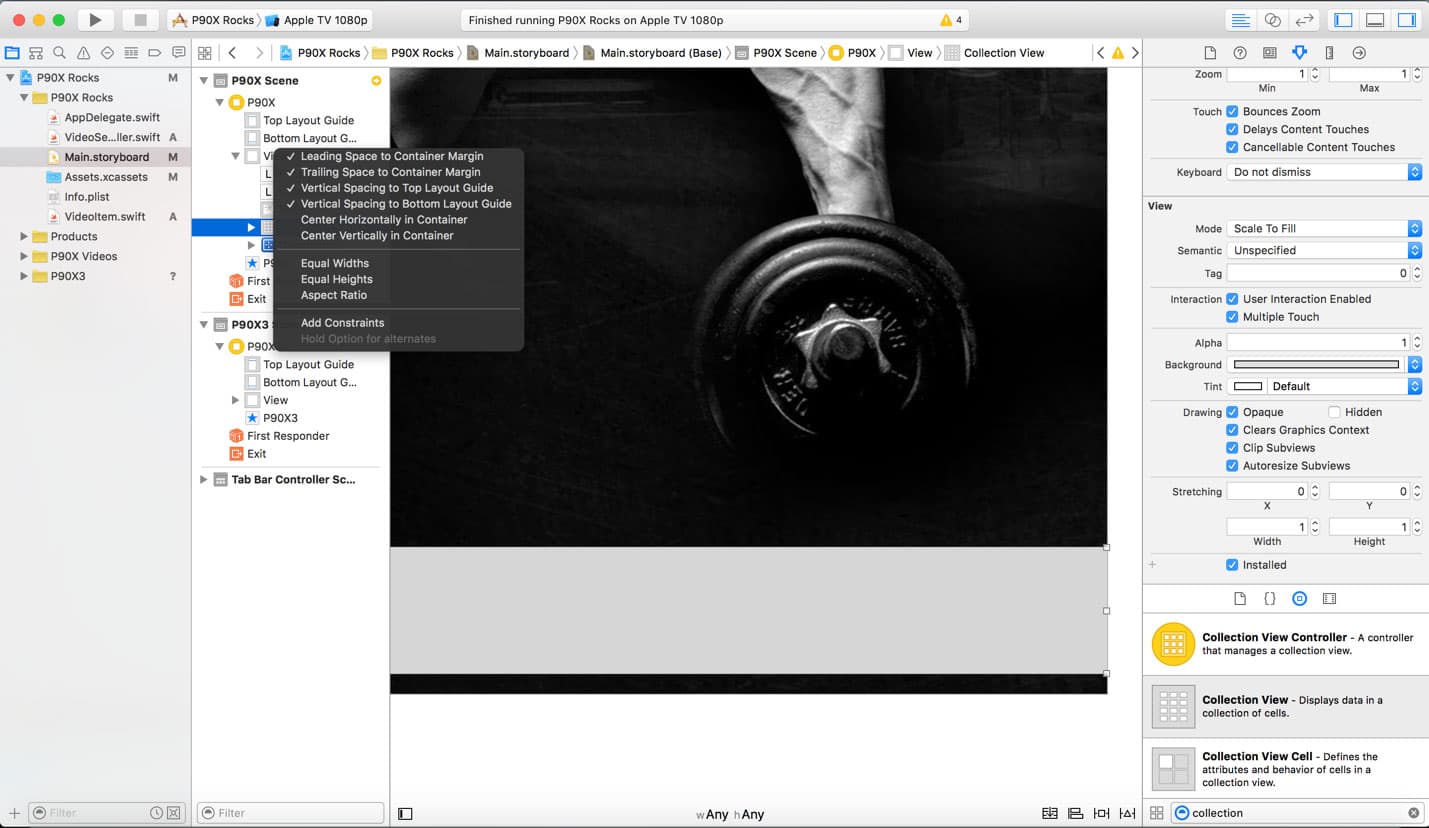
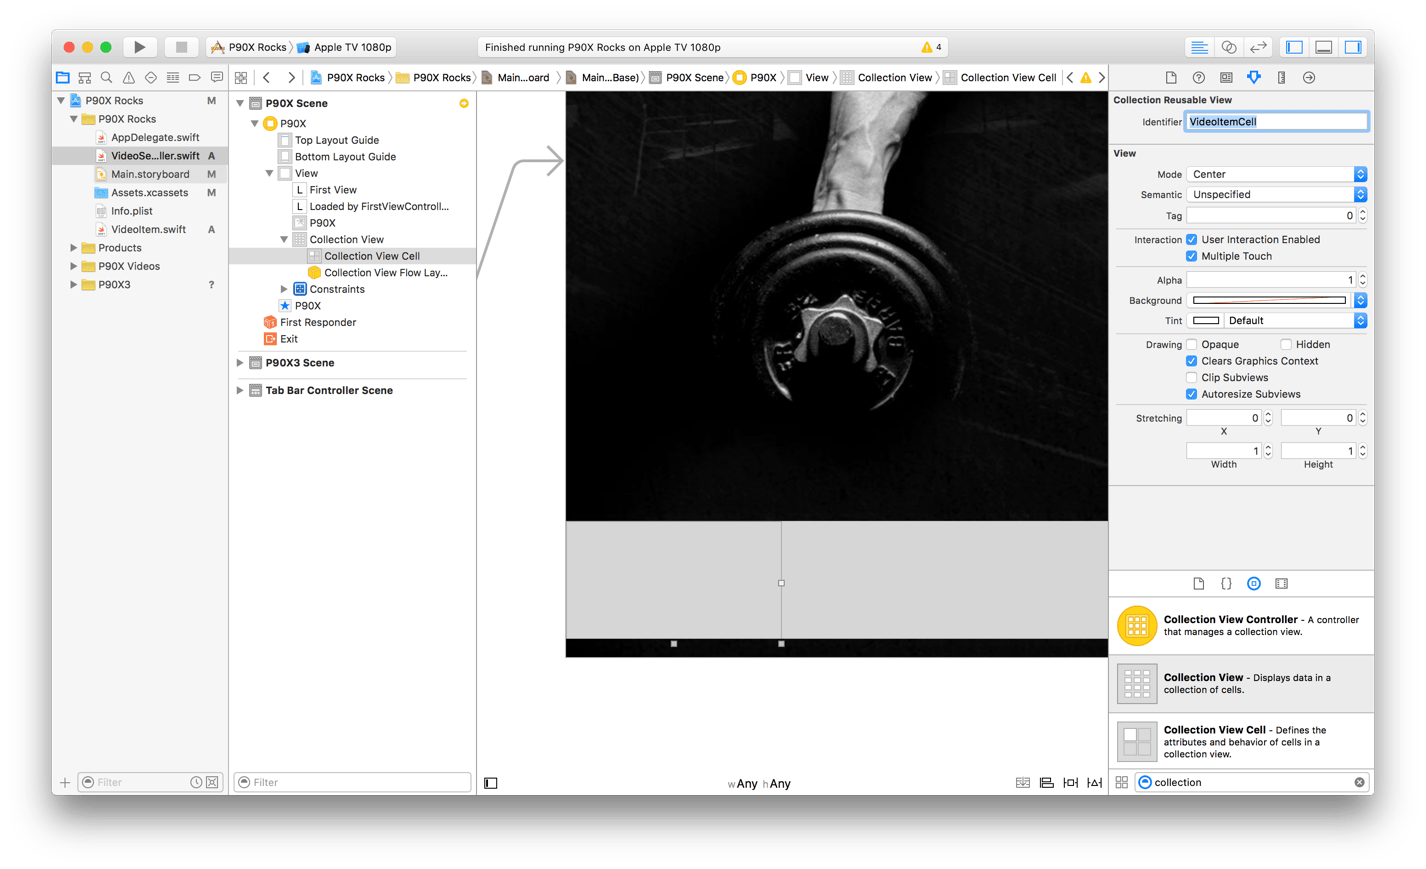
Scroll left to be able to see the first view cell and resize it to match the height of your band and with a width proportional to your video images (in my case 1920x1080 is the right proportions so I did 229x129). Also pick an identifier that matches what you entered in collectionView:cellForItemAtIndexPath (“VideoItemCell”).
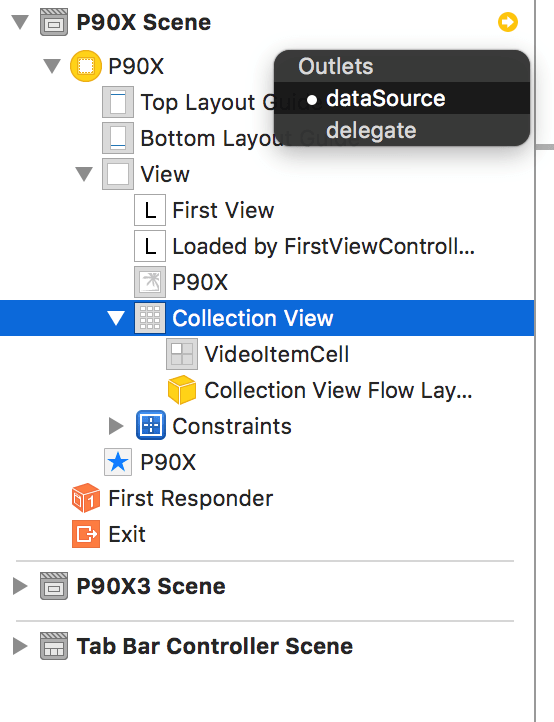
Control-drag from the collection view to the view controller (P90X in yellow) to connect the parent view controller as the data source of the collection view. This is the glue that makes the methods be called in your view controller when the collection view is about to display.
Let’s now add an image and a title.
First add an image view into the collectionview template cell, and do the drill with auto-layout to ensure it stretches to all the edges.
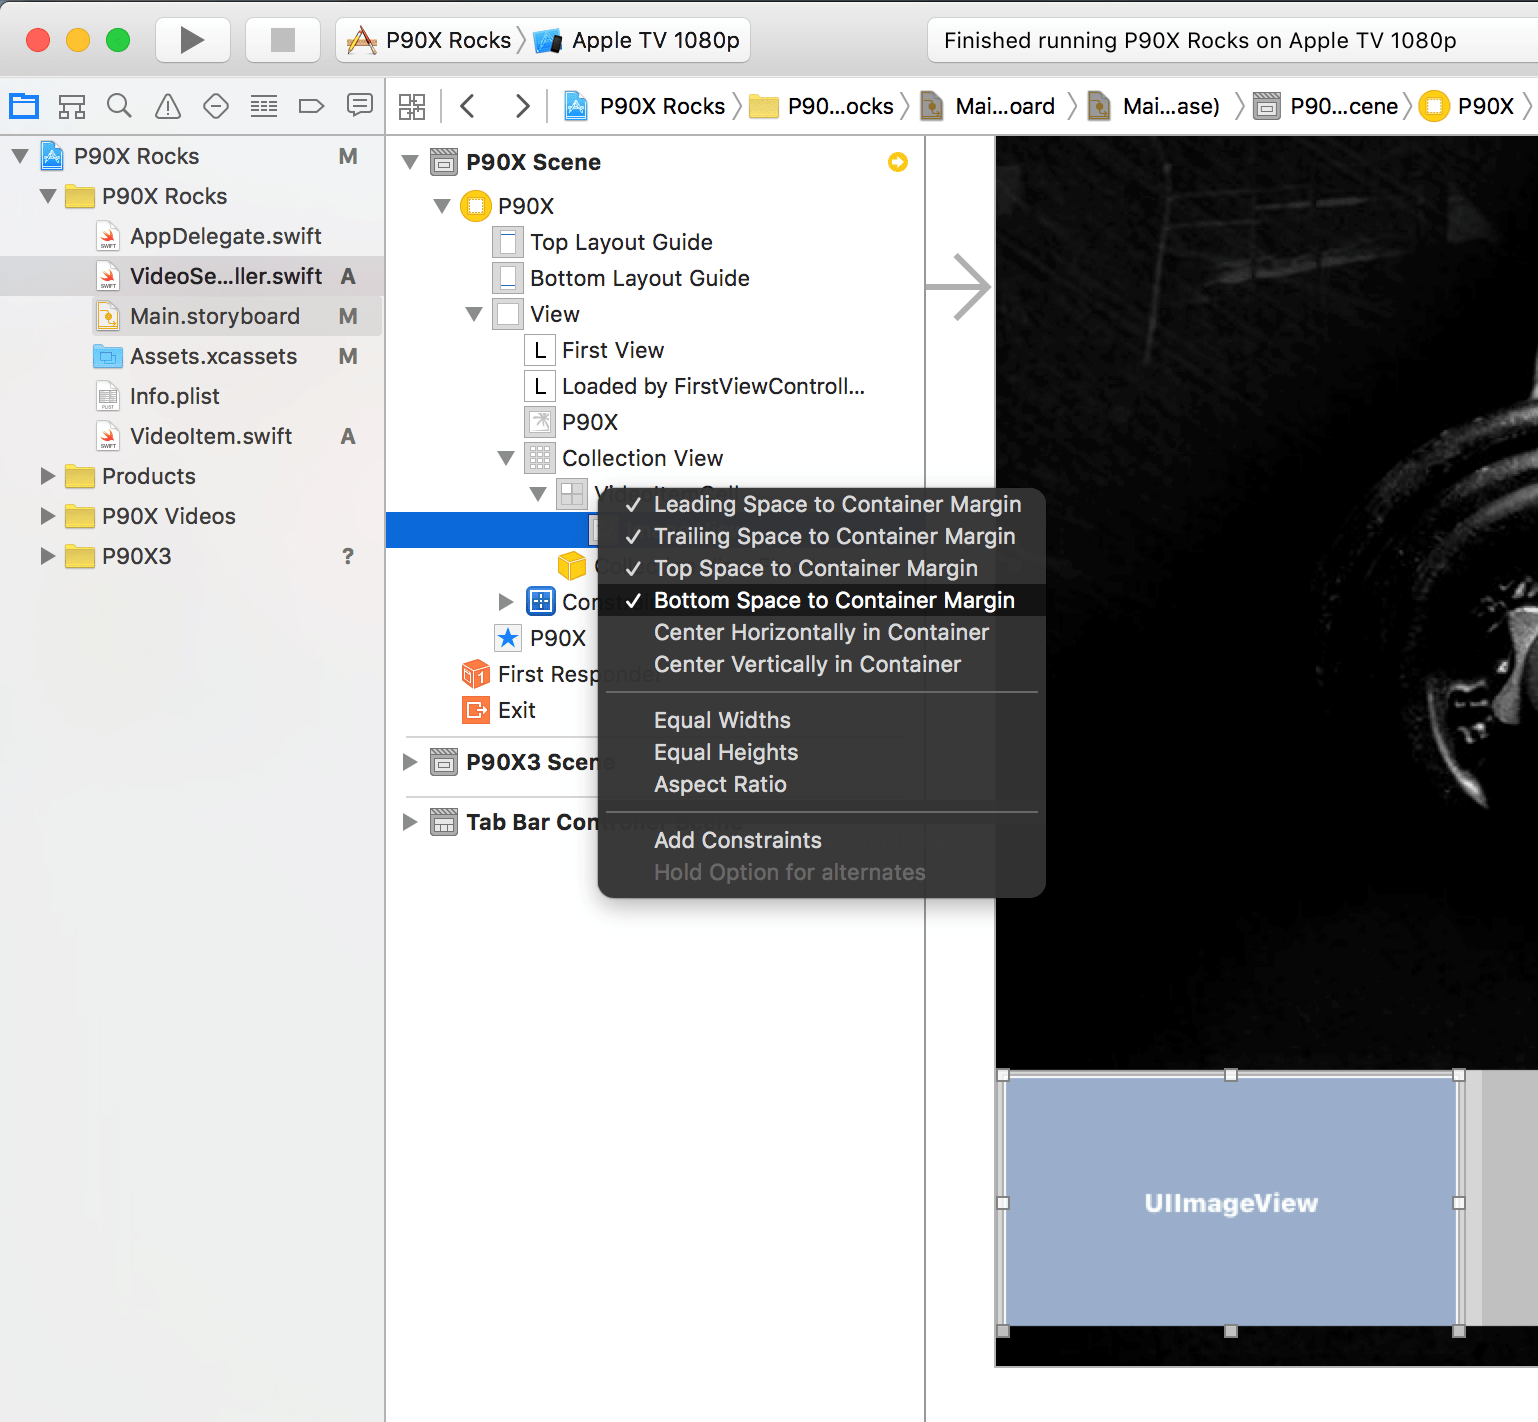
This time, however, let’s also number the view. This will help us find the imageview easily when generating our collection view cell. Let’s start at the beginning with number 1. Make sure you are doing this on the ImageView, not on another view.
Similarly, let’s add a UILabel and set the tag value to 2. Pick a nice font size color and background color for the label while you’re at it.
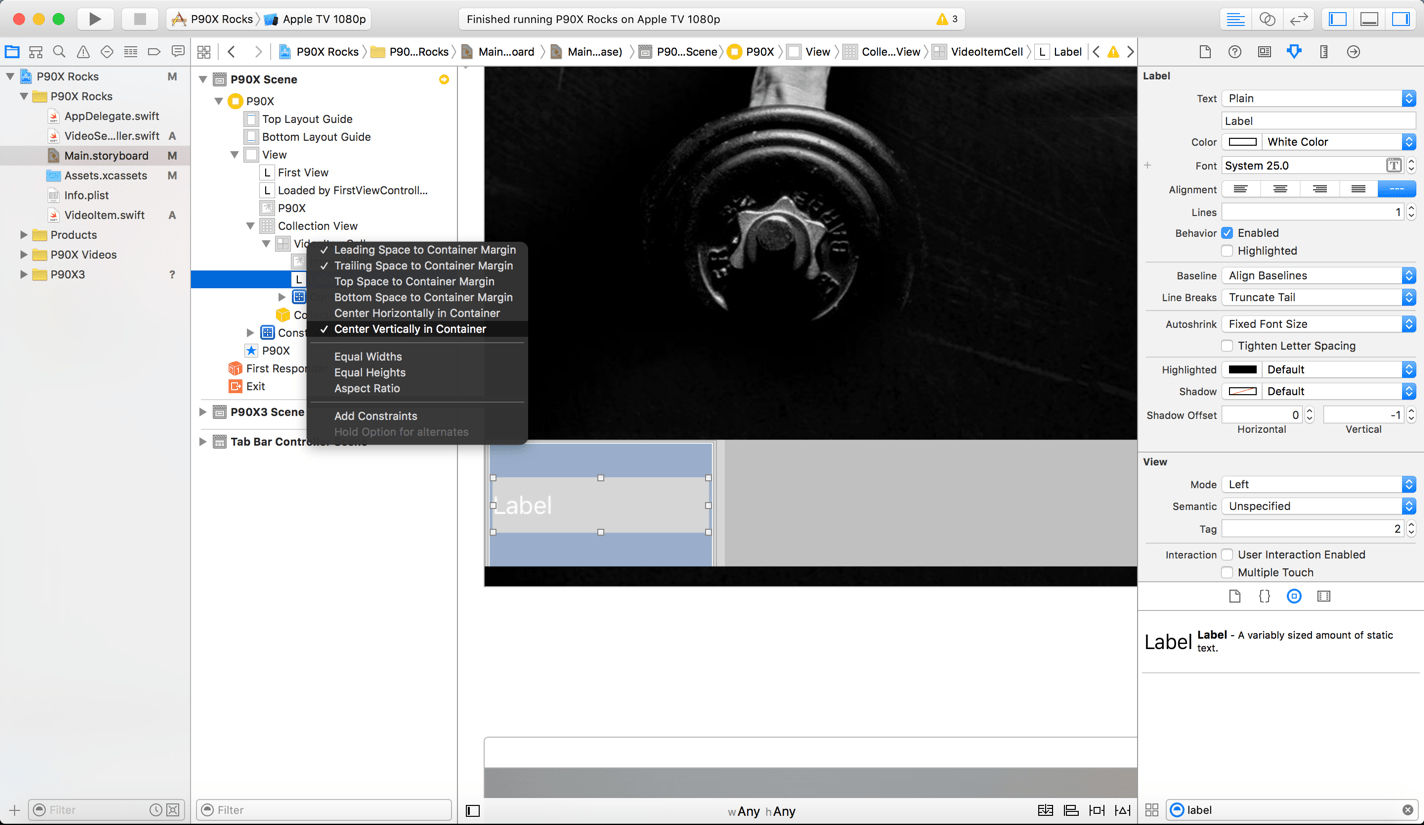
Repeat all the steps above for the other view controller.
Now edit your UICollectionViewDataSource methods to provide the right information to the collection view.
In particular, change numberOfItemsInSection to return videoItems!.count and cellForItemAtIndexPath to populate the image and label for each video.
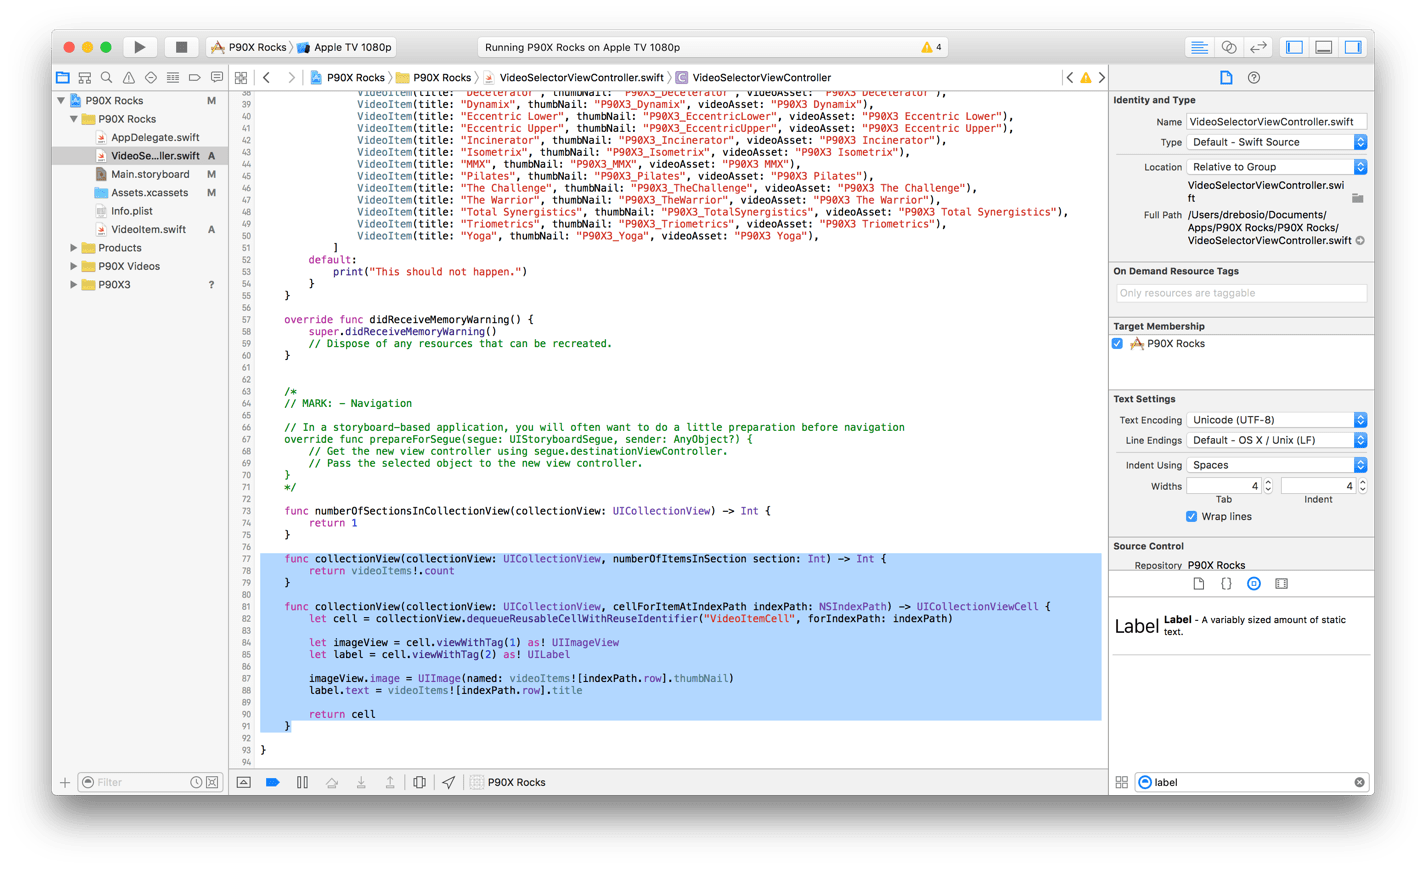
If you build and run now it should start coming to life.
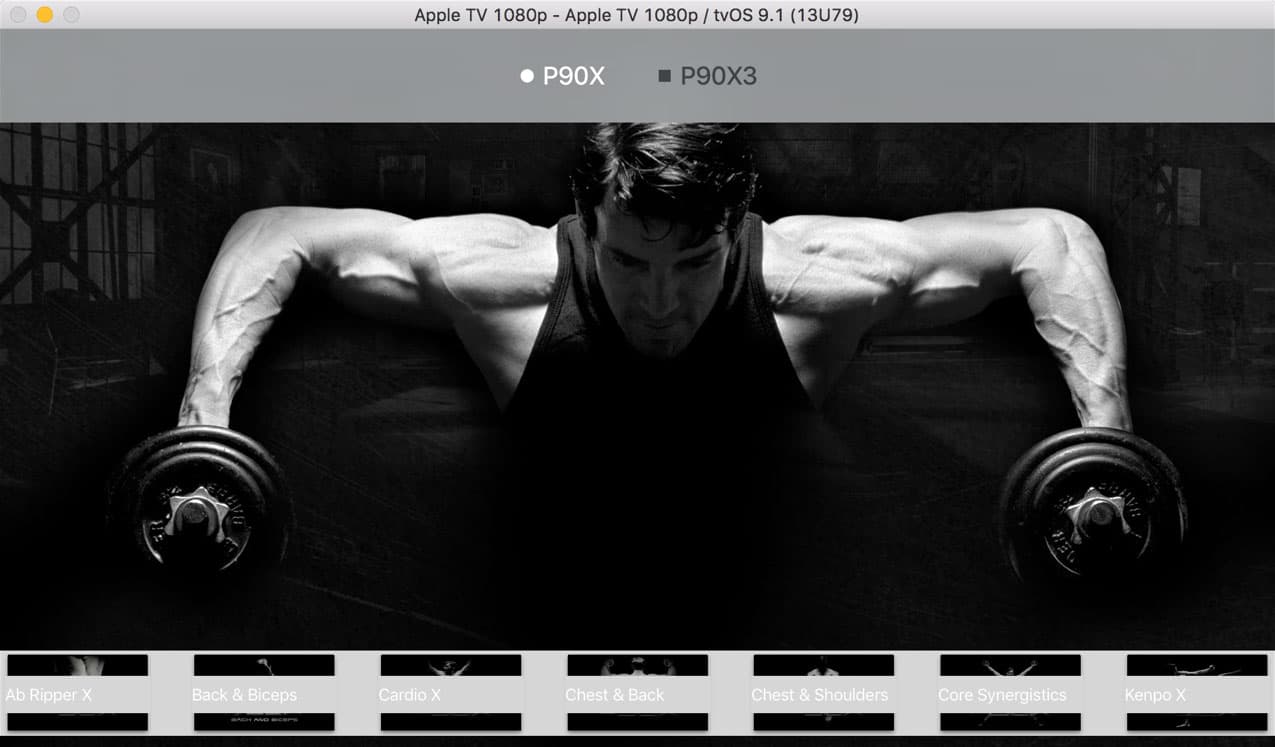
Player
So let’s now create a stock video player. Simply drag one into the storyboard. Subsequently create a segue from each of the two view controllers into it. (ctrl-drag from each of the initial view controllers to the player view controller).
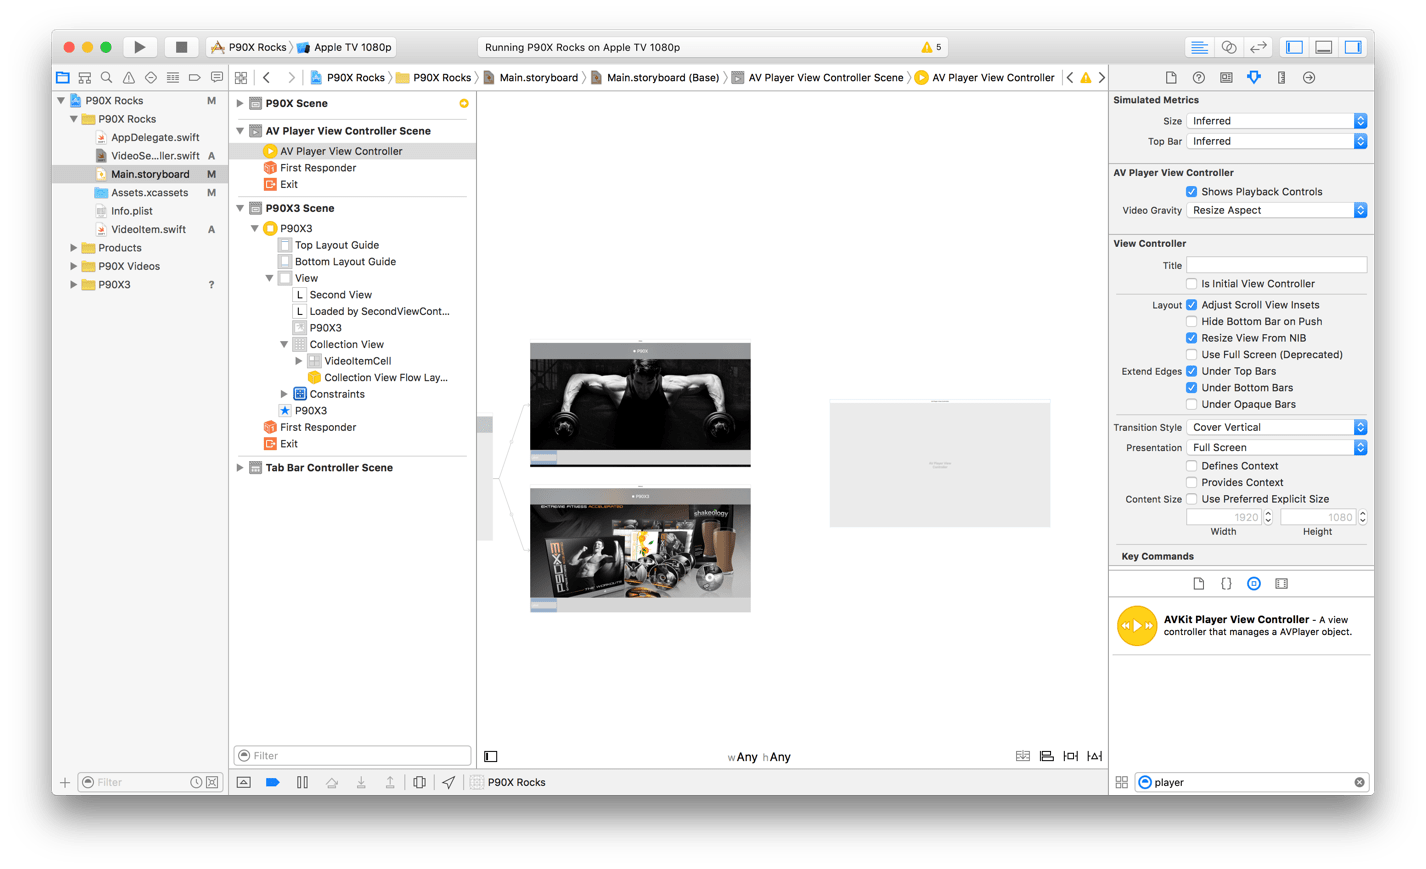
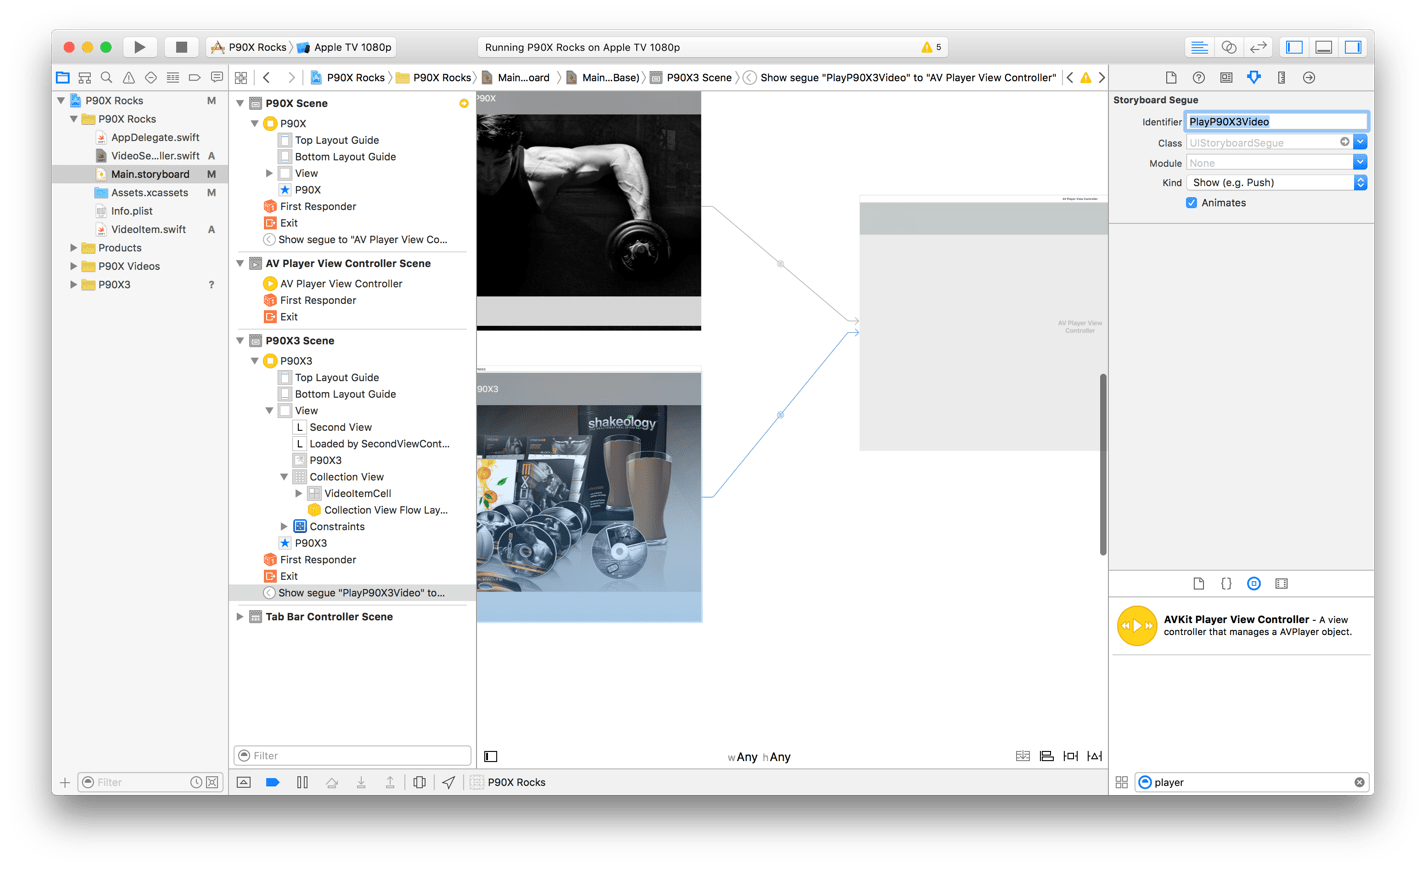
Our new player can only work with a concrete class that inherits from AVPlayerViewController so let’s make a new class file now named P90XPlayerViewController. Make sure that the class for the player matches your new class.
CollectionViewDelegate
So now let’s implement the CollectionViewDelegate. This is the part that will allow us to select an actual video, and kick-off the segue to start the video player once an item is selected.
Start in the storyboard by control-clicking form each of the two collection views into their parent view controllers and selecting “delegate” as an outlet. Make sure you do this in both of them.
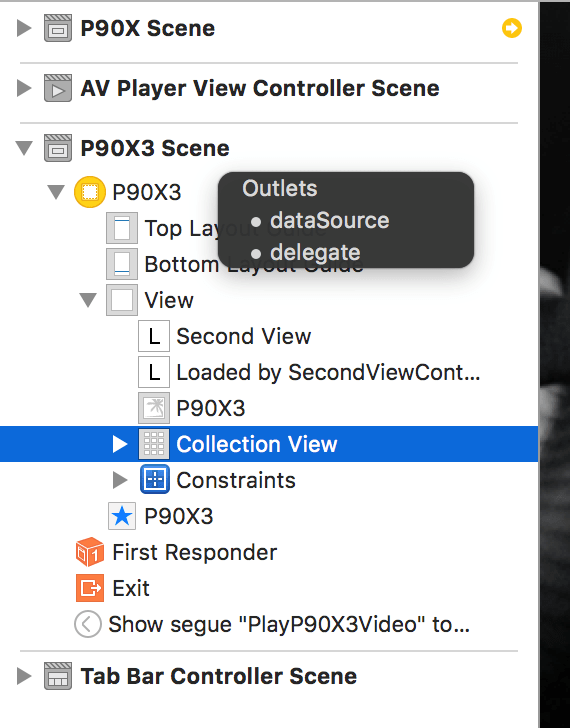
Now add UICollectionViewDelegate to the list of protocols that VideoSelectorViewController implements:
class VideoSelectorViewController: UIViewController, UICollectionViewDataSource, UICollectionViewDelegate {Let’s now implement collectionView:didSelectItemAtIndexPath (note a common mistake is to select didDeselect instead…)
func collectionView(collectionView: UICollectionView, didSelectItemAtIndexPath indexPath: NSIndexPath) {

    switch self.tabBarItem.title! {

    case "P90X":

        self.performSegueWithIdentifier("PlayP90XVideo", sender: self)

    case "P90X3":

        self.performSegueWithIdentifier("PlayP90X3Video", sender: self)

    default:

        print ("This line should never run")

    }

}
At this point you can build and run and your new player will open up but we have a couple big missing items:
- It’s hard to see what you’ve actually selected and
- The player opens but never plays anything (we need to connect the video).
Setting the Focus
This is one of the things that’s a little different with tvOS. Some times you need to specifically note that items can obtain “focus”. There’s actually quite a bit of documentation on this. Our problem, however is slightly different. Our collection view items DO get the focus, the problem is that there are no visual cues to show that something’s been selected. To show this, simply add the following into the cellForItemAtIndexPath method:
imageView.adjustsImageWhenAncestorFocused = true
This makes the image change its look to visually show that focus has now changed.
Feel free to build and run to show this now.
Playing the Video.
So now let’s go back to our new P90XPlayerViewController class.
Let’s simply add some logic to play the video that we are in when the view loads.
//
//  P90XPlayerViewController.swift
//  P90X Rocks
//
//  Created by Diego Rebosio on 3/9/16.
//  Copyright © 2016 Diego Rebosio. All rights reserved.
//

import UIKit
import AVKit

class P90XPlayerViewController: AVPlayerViewController {

    var videoItem : VideoItem?

    override func viewDidLoad() {

        super.viewDidLoad()
        playVideo()

        // Do any additional setup after loading the view.
    }

    func playVideo () {

        var fileURL = NSBundle.mainBundle().URLForResource(videoItem?.videoAsset, withExtension: "mp4")

        if fileURL == nil {
            fileURL = NSBundle.mainBundle().URLForResource(videoItem?.videoAsset, withExtension: "m4v")
        }

        player = AVPlayer(URL: fileURL!)
        player?.play()
    }
}
We need, however, to now populate our new videoItem variable when we kick-off the segue, so let’s go back to the VideoSelectorViewController class and implement performSegueWithIdentifier:
var currentIndexPath : NSIndexPath?

override func prepareForSegue(segue: UIStoryboardSegue, sender: AnyObject?) {

    let playerVC = segue.destinationViewController as! P90XPlayerViewController


    playerVC.videoItem = videoItems![currentIndexPath!.row]

}
Note that this method uses a new attribute currentIndexPath and so we should set this in didSelectItemAtIndexPath:
currentIndexPath = indexPath
Wrap-up
At this point everything should work now. Your final step is to attach an actual tvOS device which you can select from your device selector up on top. I don’t have one with me right this second (I’m writing this post at work and my AppleTV is at home) but you can pick it from this list, and if you are a registered developer, you will be able to install to the device at this time. It does take a few minutes the first time you do this (lots of Gbs of video to install).
The only other missing item is an actual icon for your new app. I’ll leave that exercise to you.
Enjoy!
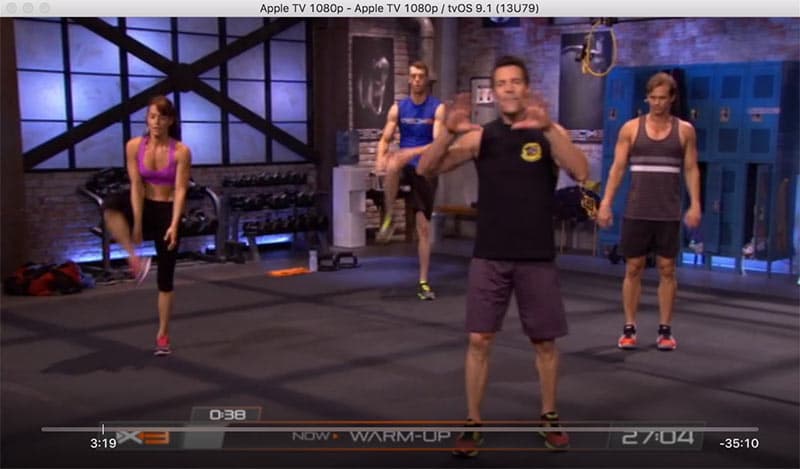
P.S. If you actually work at Beachbody, or a similar company with amazing content, feel free to ping us, we’ll be glad to get you on the right path to making your amazing content be delivered in a better way.
Recent Insights
-
BLOG

 Leonardo Bravo
5 DevOps Metrics That Actually Matter for Enterprise Cloud Infrastructure
-
BLOG

 Patrick Wirz
Celebrating Oshyn’s 2026 Sitecore MVPs
Excellence in Tech and Strategy
-
BLOG

 Esteban Bustamante
Mastering Adobe Composable
Part 3/3: AEM Hybrid Options
-
BLOG

 Esteban Bustamante
Mastering Adobe Composable
Part 2/3: AEM Headless Tools


