Content Profiling in the Sitecore Online Marketing System


Nov 09, 2011
Update:Sitecore OMS has been renamed to Digital Marketing System in Sitecore v6.5 and provides for Profile Cards to faciliate consistent and standardized content profiling. This blog is applicable to Content Profiling in versions prior to Sitecore v6.5 using Online Marketing Suite v2.0. Will publish in future post the modified pattern of profiling, involving usage of Profile Cards.
One of main features of the Sitecore Online Marketing System (OMS), is Content Profiling. Content Profiling in the Sitecore OMS includes: developing profiles, creating profile keys, as well as assigning profiles to content items.
Creating Profiles
The term “profile” refers to a recognized behavior of a visitor. A good process of profile creation allows a marketing person to categorize the content of a website. The main purpose of a profile is to identify different types of visitors and their content preferences.
To create profiles in Sitecore, follow these steps:
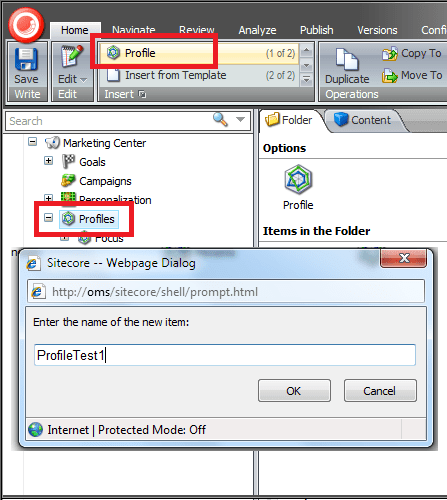
- Open Marketing Center
- In the left panel click on the “Profile” node
- In the ‘Insert’ options, select “Profile”
- Enter the name of the new Profile
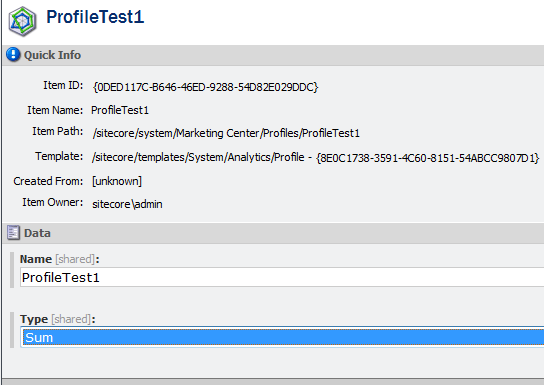
- Once the new Profile is created, click in the new Profile node. You will see two properties: ‘Name’ and ‘Type’. The ‘Type’ field allows you to define how Profile values are calculated
- Then, perform a Smart Publish
Creating Profile Keys
A “Profile Key” defines a specific characteristic on a profile. Profiles are built based on different kinds of profile keys which enable each visit a visitor makes calculate a profile score. The score is calculated according to the profile key’s value that has been assigned to the content. Ultimately, the score gives information about the visitor’s level of interest in a website.
In order to create and assign Profile Keys to a Profile, follow these steps:
- Select the Profile you want to assign a new Profile Key
- In the Insert options, select ‘Profile Key’
- Enter the name of the new Profile Key
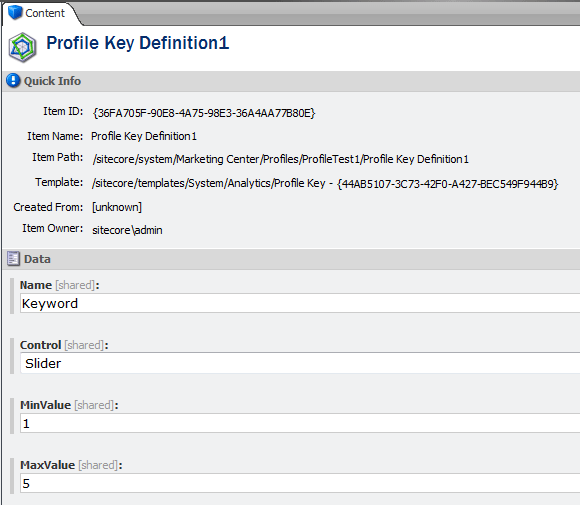
- In the Properties window you can define: Name, Control (control that appears in the Profile window), Minimum and Maximum Value, and save the values.
- Then, perform a Smart Publish
Assigning Analytics Values to Content Items
Now that you have created content profiles, the next step is to assign and configure profiles to content items. Follow this simple process:
- Go to ‘Content Editor’
- Select the content item in the Tree view
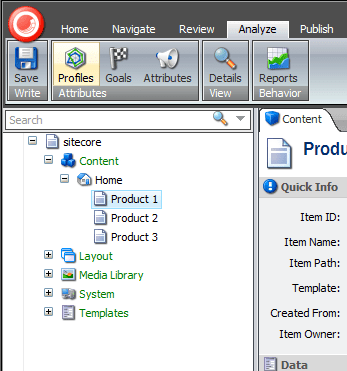
- In the top menu, click on ‘Analyze’ and select ‘Profiles Attributes’
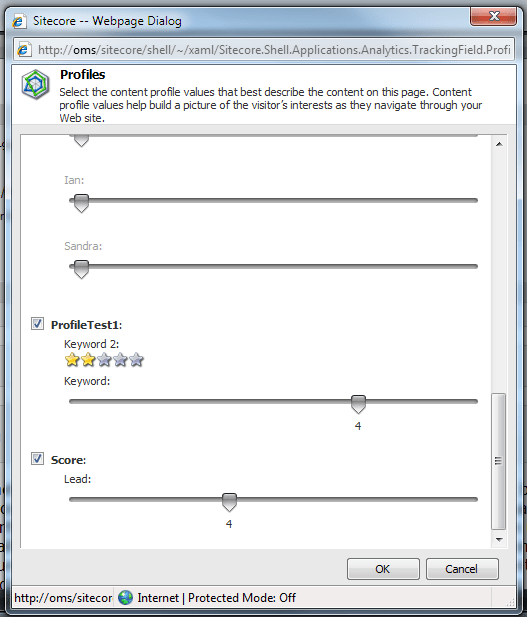
- In the next pop-up window, you will see a list of all the profiles created in the Marketing Center. Select the profiles you want to assign to this content item to enable them.
- Under each profile a list of all the assigned profile keys are displayed. You need to define the score of each profile key according on the characteristics of the content item.
Viewing the Session Trail
The last thing is to see the results in the Session Trail. In order to do this, you must:
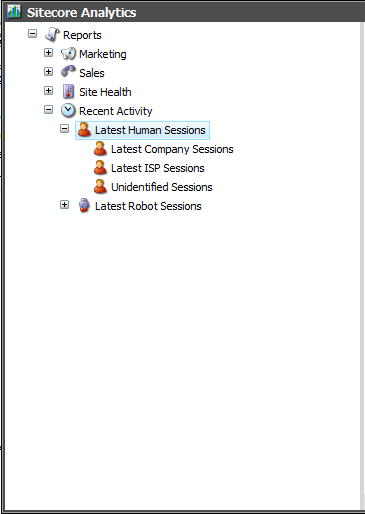
- Go to Sitecore Analytics
- In the left panel, select ‘Recent Activity’ and select ‘Last Human Sessions’
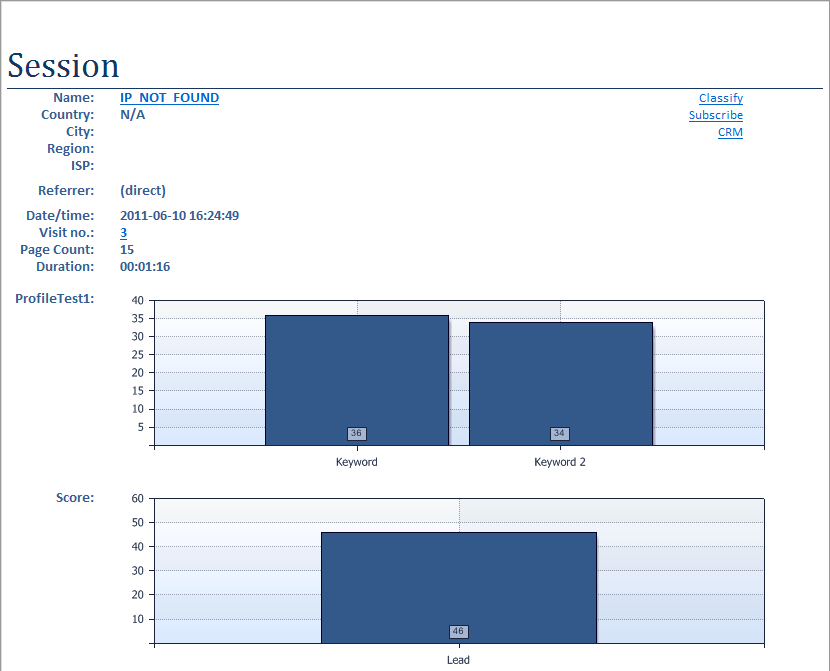
- A report is generated; you will see something similar to this report:
Sitecore provides content profiling as a useful feature that enables a huge possibility of content customization and visitor’s recognition, all the information obtained through the content profiling results allows administrators to provide high quality content and services in the website.
Recent Insights
-
BLOG

 Leonardo Bravo
5 DevOps Metrics That Actually Matter for Enterprise Cloud Infrastructure
-
BLOG

 Patrick Wirz
Celebrating Oshyn’s 2026 Sitecore MVPs
Excellence in Tech and Strategy
-
BLOG

 Esteban Bustamante
Mastering Adobe Composable
Part 3/3: AEM Hybrid Options
-
BLOG

 Esteban Bustamante
Mastering Adobe Composable
Part 2/3: AEM Headless Tools


