ClickOnce is a Microsoft technology that lets you easily deploy and update your Windows application, whether it is a Windows Forms, Windows Presentation Foundation (WPF), Console application or an Office solution (VSTO).
The application can be deployed using 3 different ways: from a Web Page, from a Network File Share or from media such as CD-ROM.
There is plenty documentation and examples out there that show you how to deploy an application using ClickOnce. In this blog I am going to show you how to create a custom installer for a ClickOnce application.
A custom installer could be required in case we need to provide custom user experience to our default ClickOnce installation process. Custom logic may include among others, system requirements checks, license agreement screen, customs messages, etc.
In order to facilitate this, Microsoft has provided us with the System. Deployment. Application namespace which contains classes that let us customize the install and update behaviors in our ClickOnce application.
The following steps will show you how to create a Custom Installer that installs an already existing ClickOnce application. Make sure you have a ClickOnce application deployed to either a web server location or a network share. If not, see the Microsoft documentation for instructions on how to do it.
Create a Windows Forms or WPF application and specify a name for it. I am using a Windows Forms application named ClickOnceCustomInstaller for this tutorial.
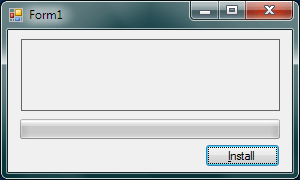
Place a Label, a ProgressBar Control and a Button on the default form. Set the Modifiers property of the Label and ProgressBar to Public, so you can access them from the custom installer class logic added in the following steps.

Add references to System.Deployment and System.Windows.Forms if needed.
Add the following class to your project CustomInstaller.cs. This class handles the logic to install the application. It uses various methods in the InPlaceHostingManager which belongs to the System. Deployment. Application namespace mentioned above.
Now let’s add some logic to invoke the installation process from our form. Use the following code for the button’s click event.
privatevoidbutton1_Click(objectsender,EventArgse)
{
    const stringdeployManifestUri =
    "http://localhost/ClickOnceDemoApp/ClickOnceDemoApp.application";
    CustomInstallerinstaller =newCustomInstaller();
    installer.InstallApplication(deployManifestUri);
}
In the code above the variable deployManifestUri represents the Uniform Resource Identifier (URI) to the deployment manifest of the application that will be installed or in other words the location of the manifest where the ClickOnce application was deployed to.
Run the application and click the Install button.
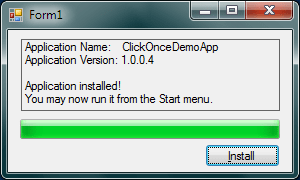
The application will be downloaded from the server and installed on the local machine. You will see the following screen.

The application has been installed on your computer and you can now run the application from the Start menu link, or the desktop shortcut if one has been created.
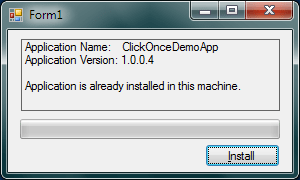
If you try to run the installer again, you will get the following message.

So now you can use this as your starter code to build your own Custom Installer, adding the forms and related logic needed for your application.
Also, please note that you can use the same ClickOnce Deployment API to override the default update behavior and check for updates using your own custom logic.


